There are two ways how to setup your AmbiScreen.
Simple way is as access point. More advanced way is for home wifi network. Both will be described below (images are clickable).
 This is Eye
 This is WiFiLED
Setup AmbiScreen as Access Point – Simple Setup (recommended)
This is the easiest way and the most convenient. WiFiLED will be connected to Eye’s access point wifi network. This will work when there are no wifi credentials stored in Eye (if you have stored home wifi credentials in your Eye device previously, go to Eye’s wifi settings and reactivate default wifi AP or reset device).
If your home wifi network is slow or you have many devices in it, you can see lag or flashing LEDs from time to time – in this case your best bet is to set “AmbiScreen as Access Point” as described here.
Note: WiFiLED device boots within few seconds. But Eye boots in 1-2 minutes, so it can be visible in accessible wifi networks list in 1-2 minutes after boot. Eye needs to be fully booted before WiFiLED can connect to Eye’s wifi access point.
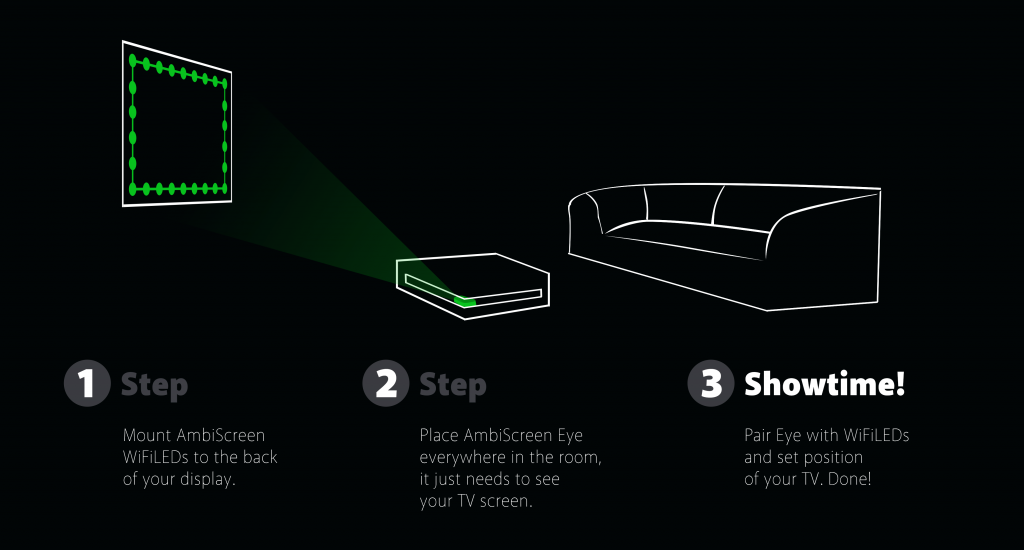
- Turn on power on both Eye and WiFiLED.
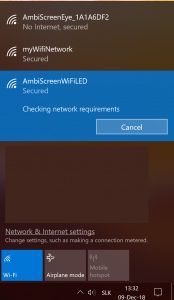
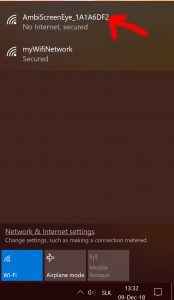
- Connect to AmbiScreenWiFiLED network
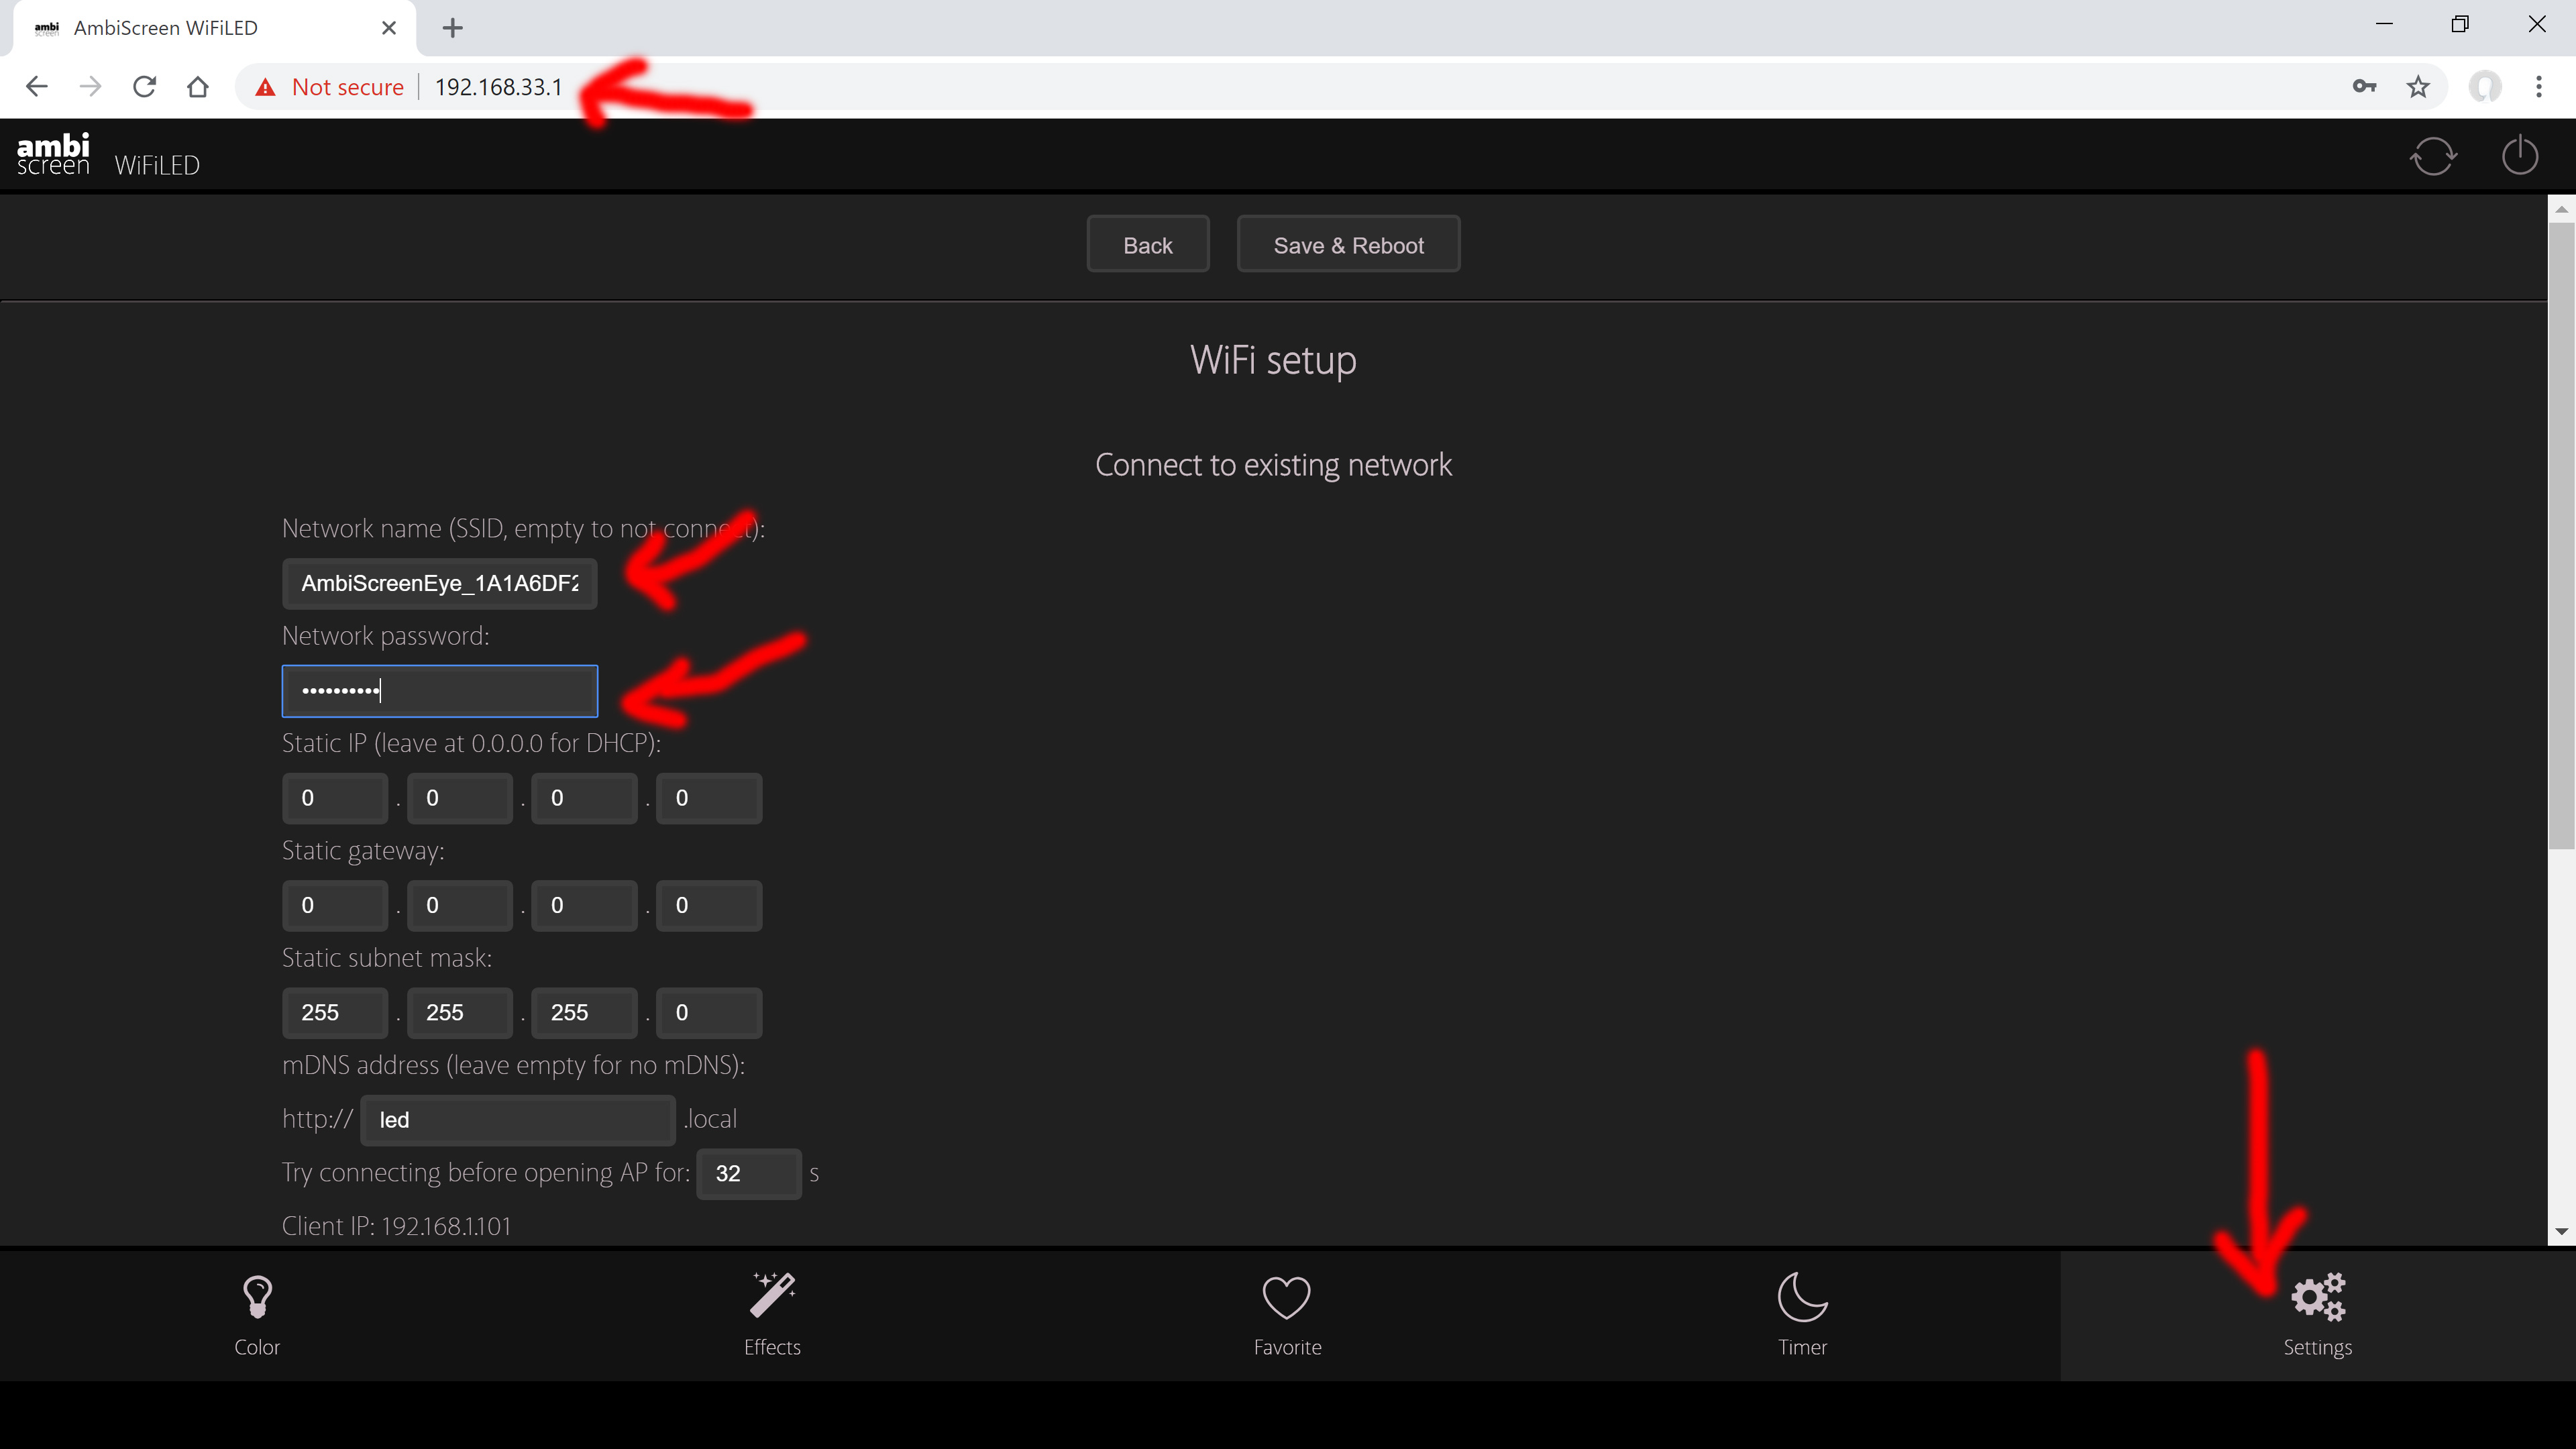
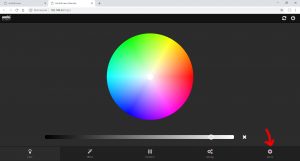
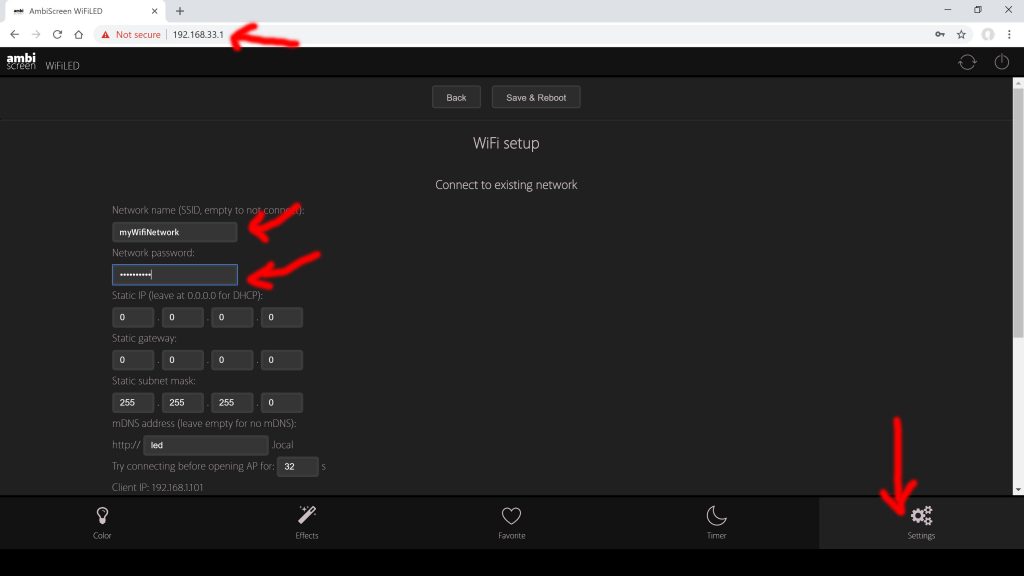
- In web browser (e.g. Google Chrome) navigate to http://192.168.33.1. Then click on last Settings Tab (down right) and insert network name (e.g. AmbiScreenEye_1A1A6DF2 but in your case last characters will be different according to step 2) and password “ambiscreen33” (without quotes). Click on Save&Reboot. Once rebooted, unplug WiFiLED from power, wait 5 seconds and plug to power again.

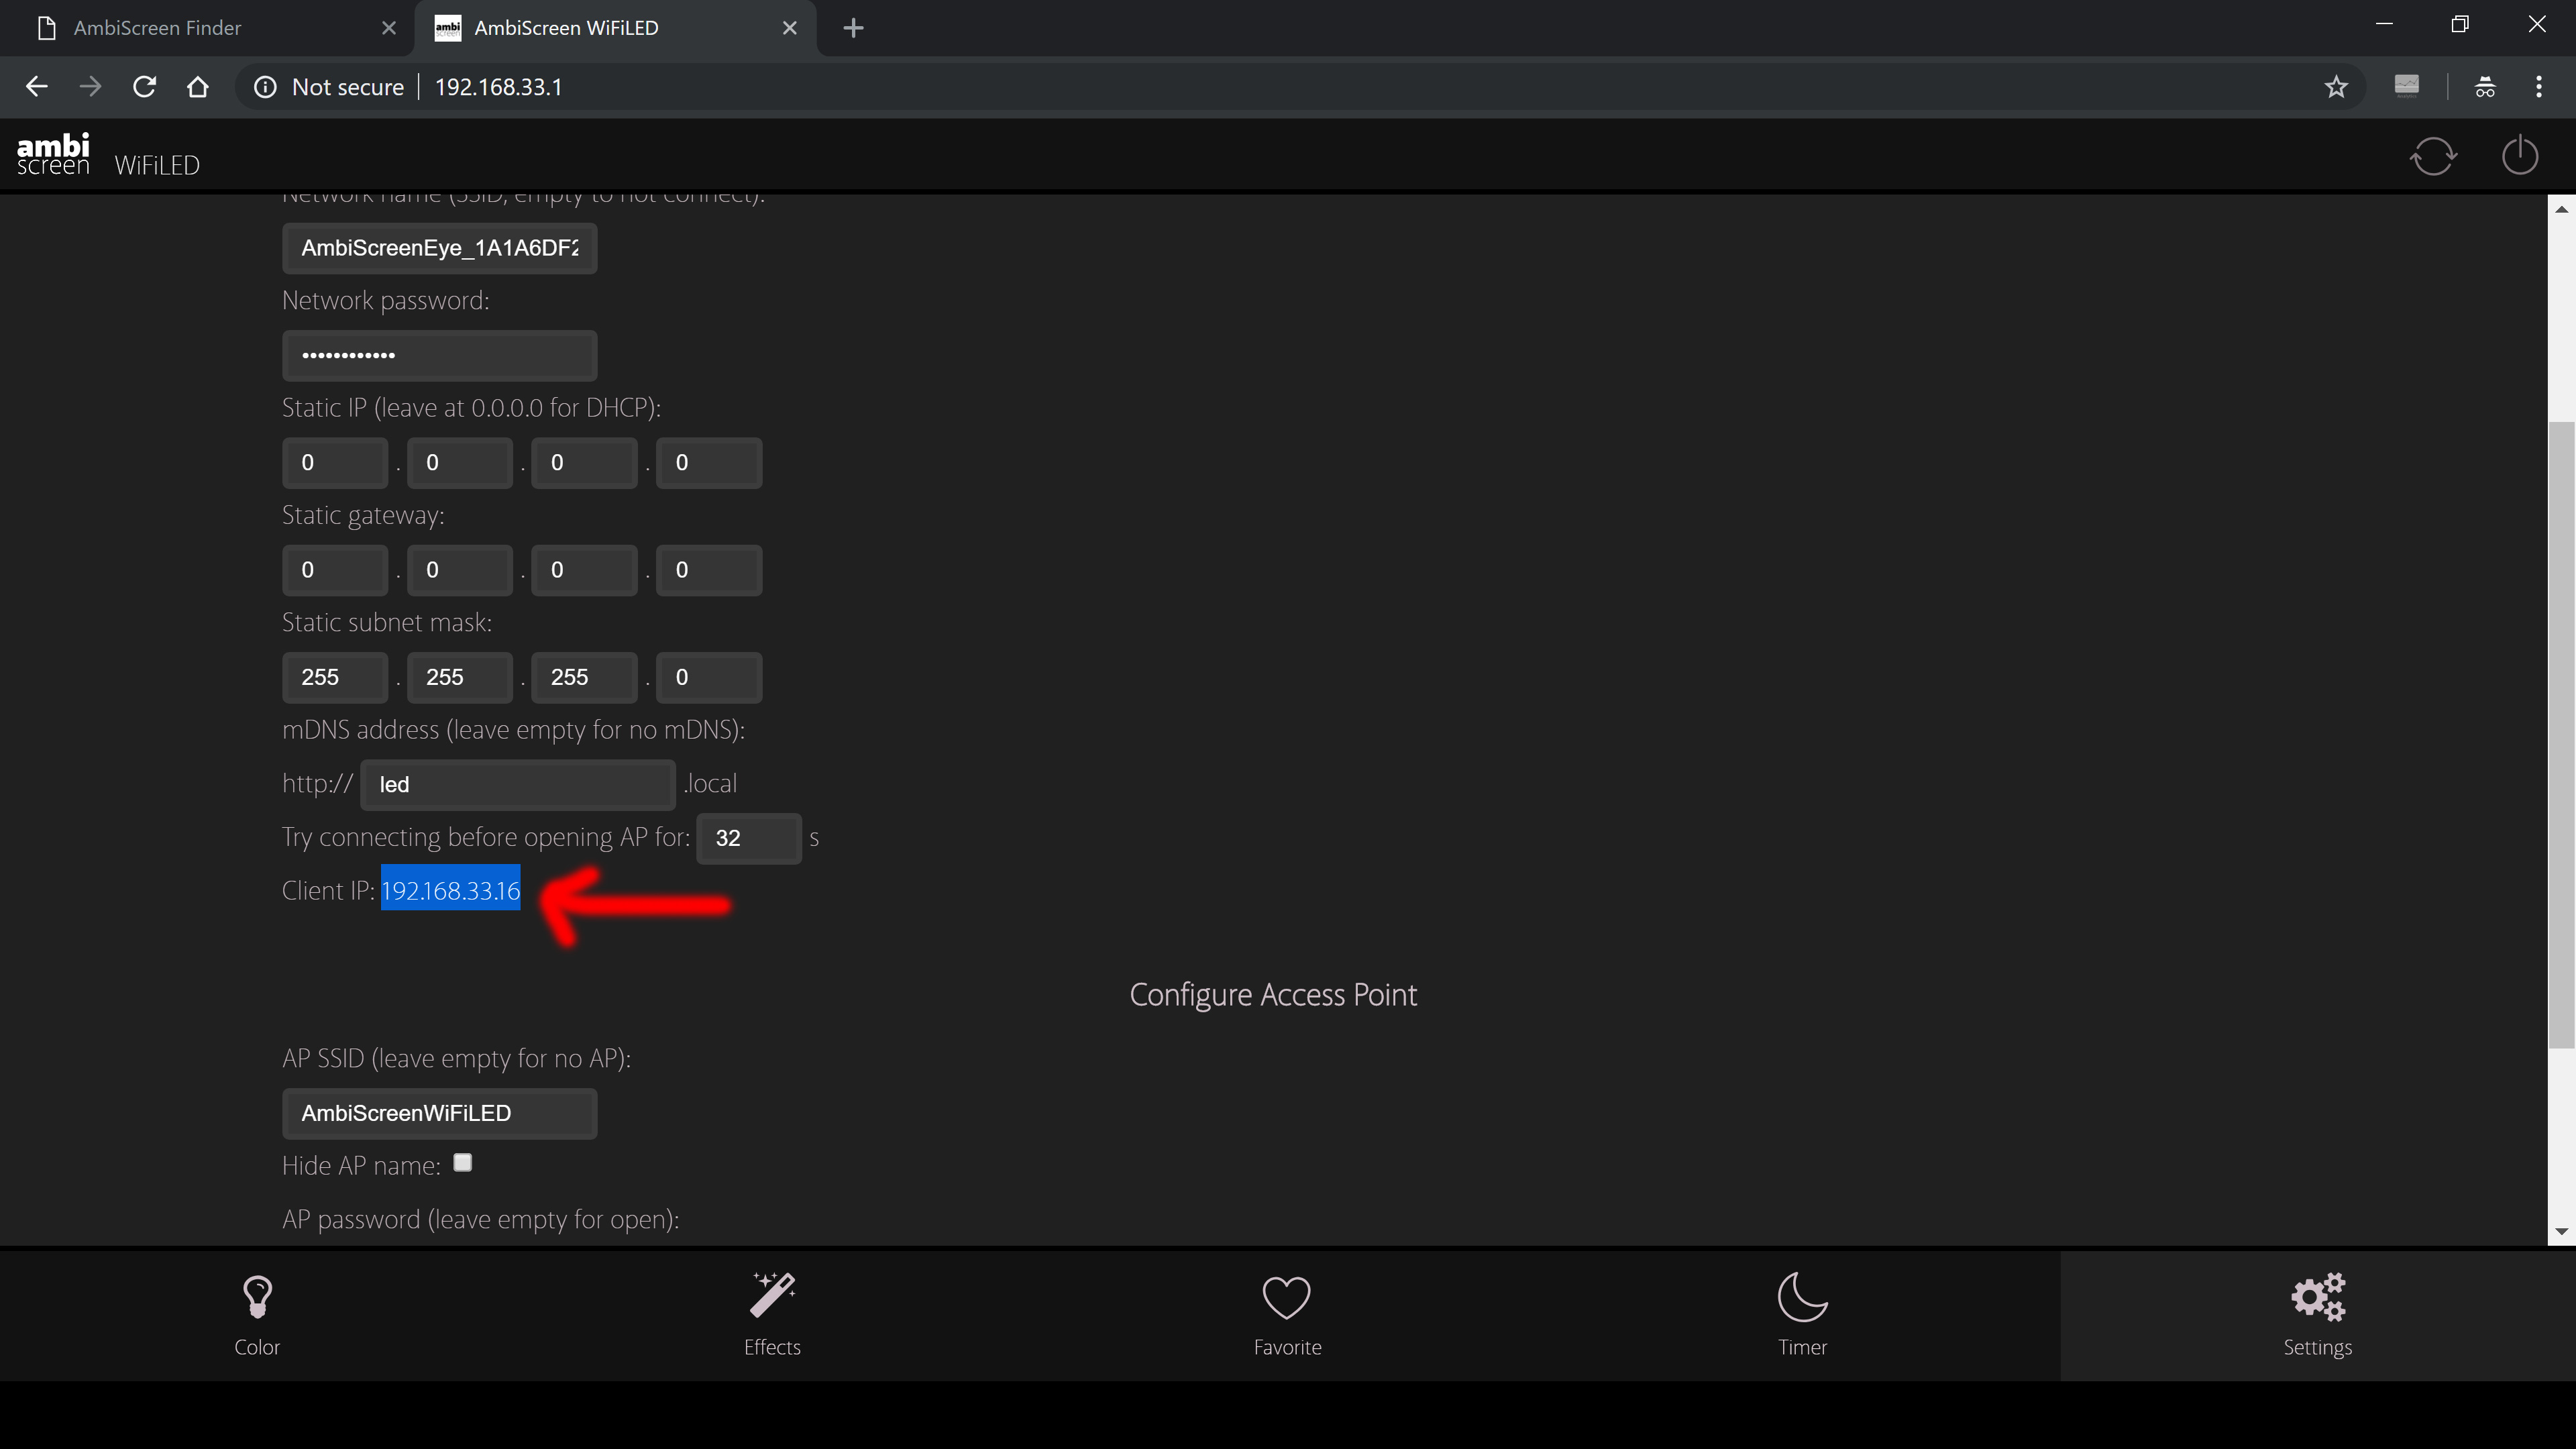
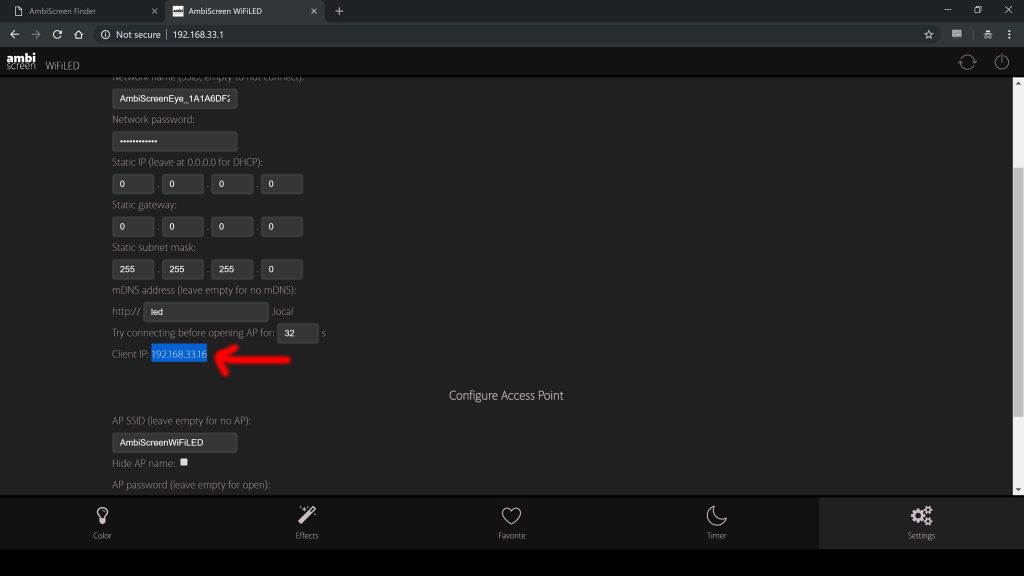
- Connect to AmbiScreenWiFiLED network again and navigate via web browser to 192.168.33.1 – Settings – and copy IP client address (in this case 192.168.33.16 but your can be different)
- Connect to AmbiScreenEye_1A1A6DF2 network (but in your case last characters will be different)
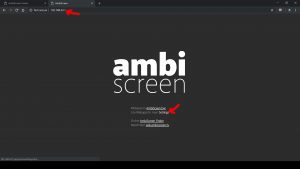
- Navigate to 192.168.33.1 and then click “Lite webapp for main Settings”
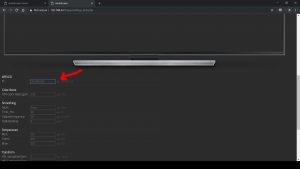
- Then go Settings – LEDs and in field WifiLED IP insert IP from step 4 (in our case 192.168.33.16, in your case it can be different). You can customize other Led settings on this page, too. Then click on save and your Eye and WiFiLED will be synchronized from now.
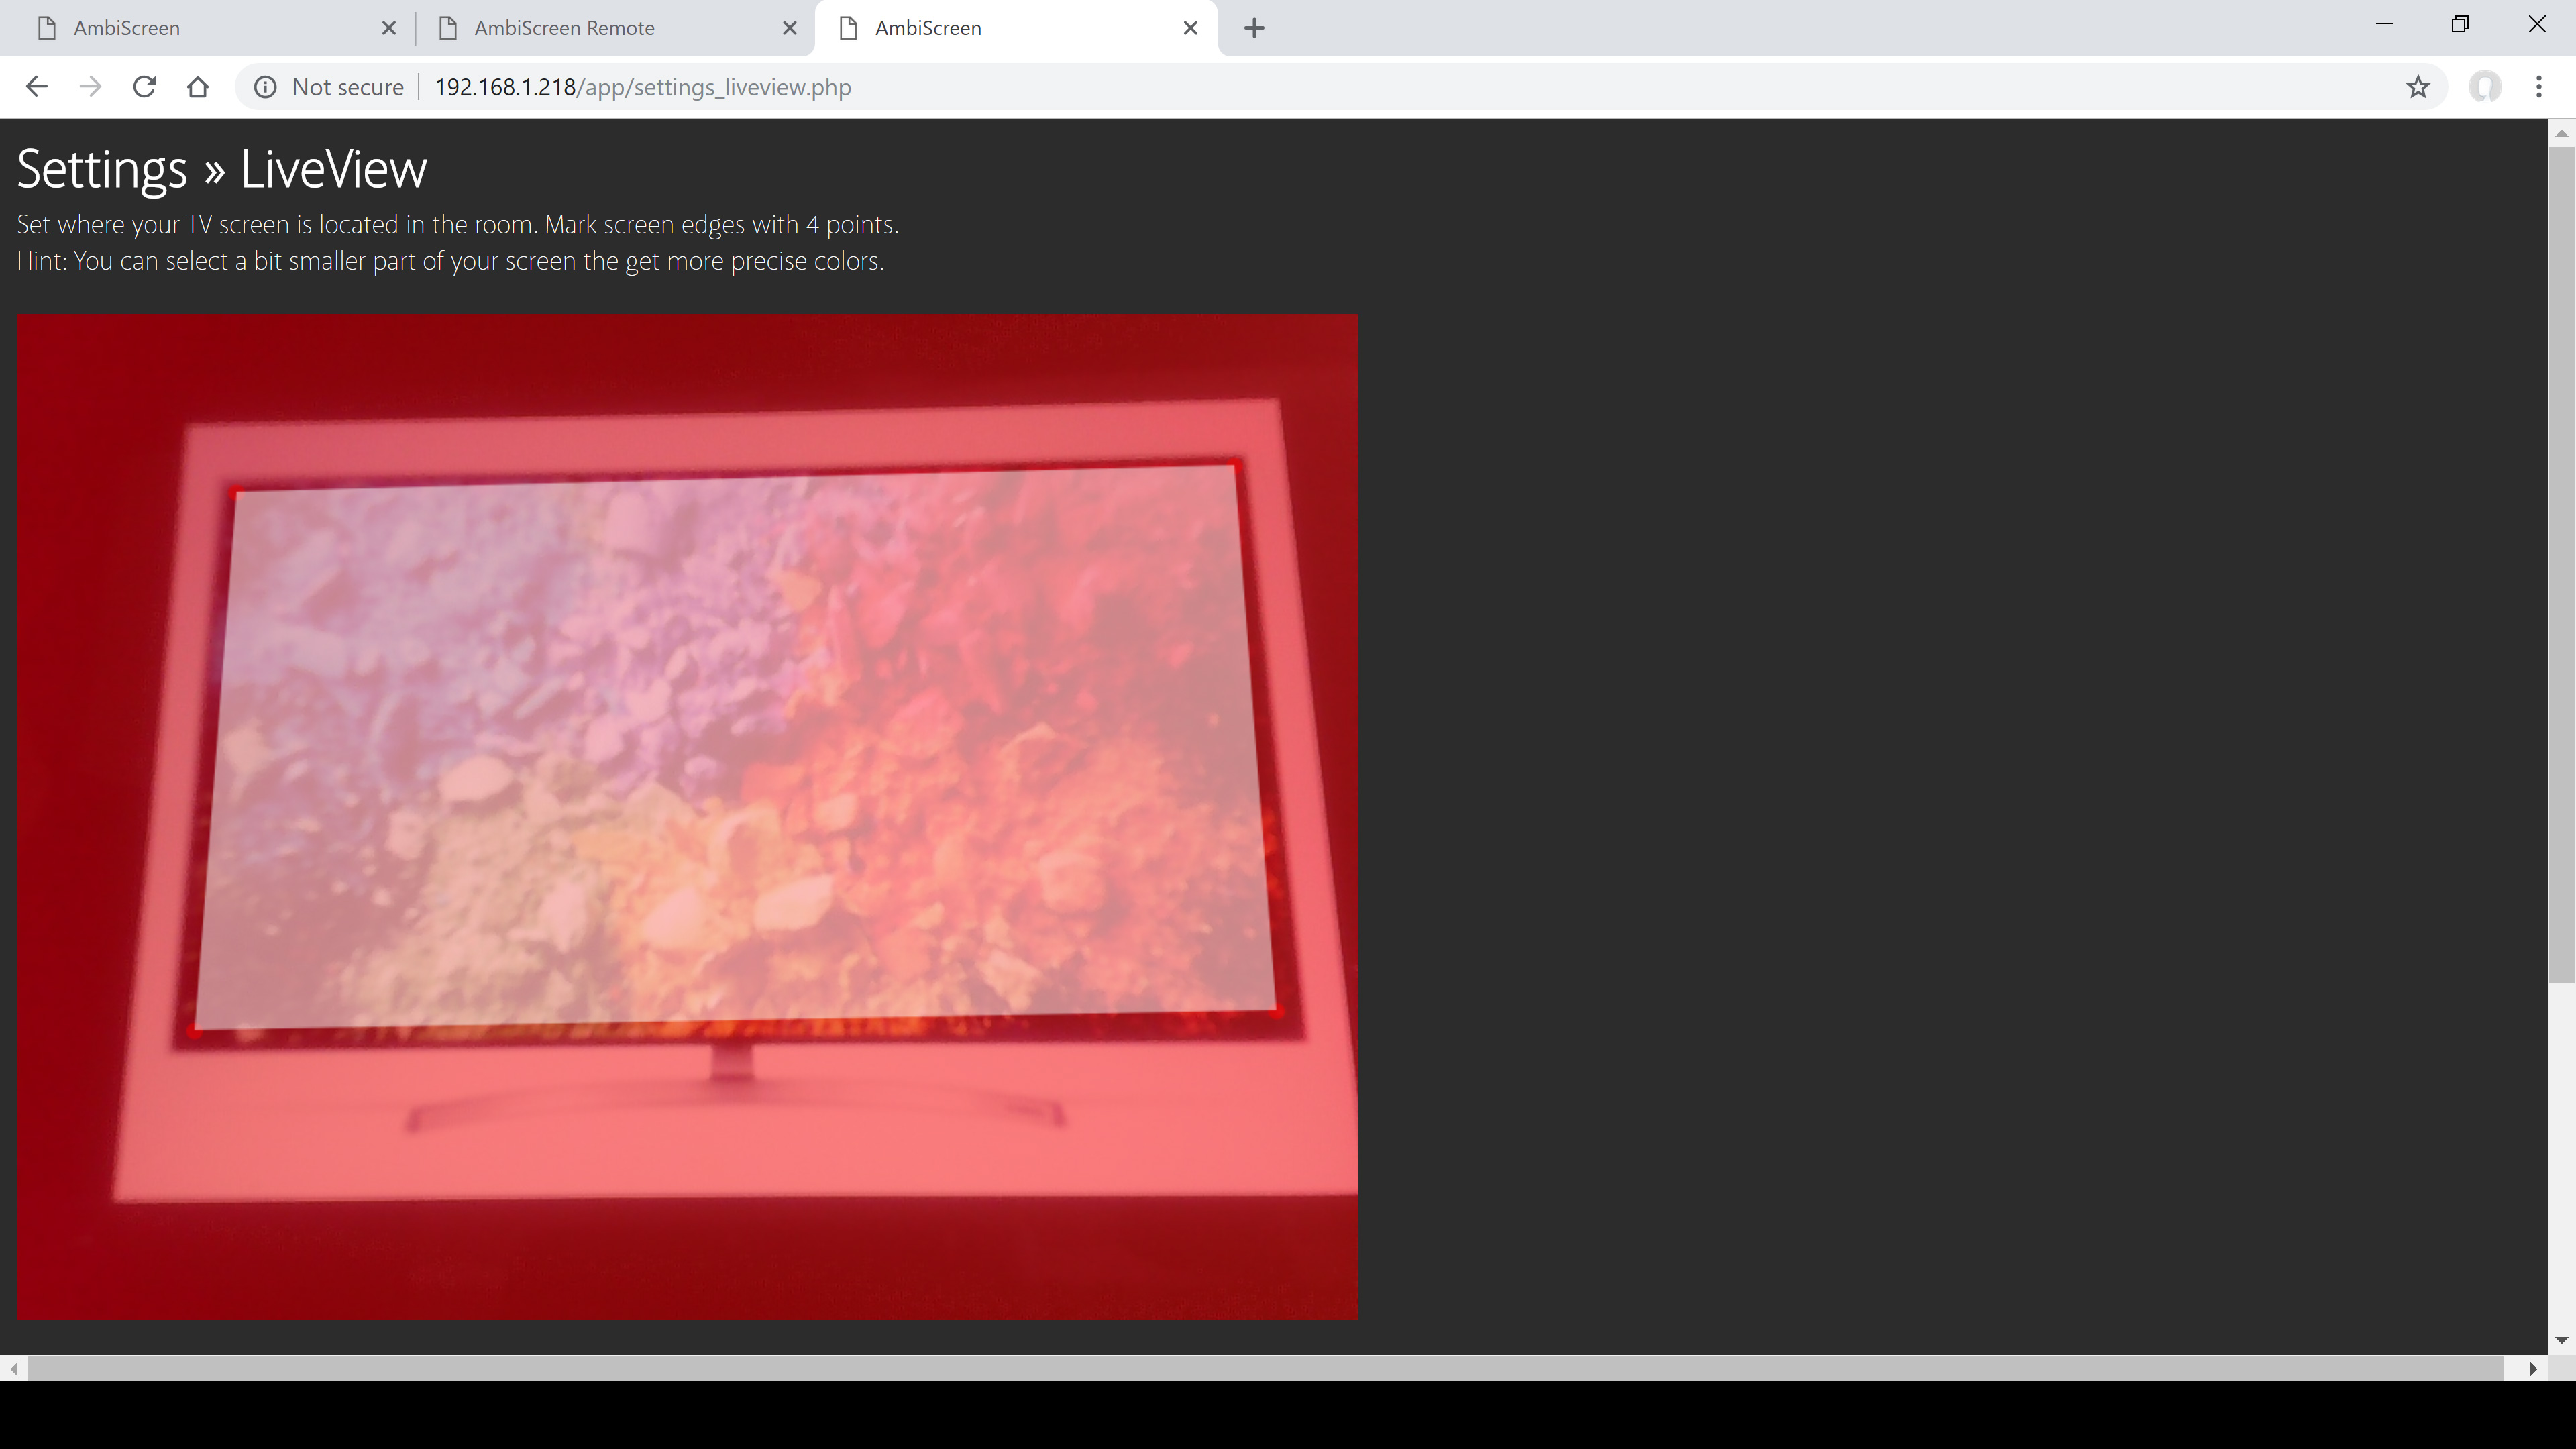
- When you save LEDs settings navigate to Settings – LiveView and setup 4 edges of your TV screen on picture. Click save.

- Alternatively you can use Finder to locate your Eye device, but in this setup it will have always IP 192.168.33.1. In this setup Finder will not locate WiFiLED as single device, because Eye is master device for this case. If you want to use Finder, you need to connect to your home wifi first, then open http://finder.ambiscreen.tv in browser, then connect to Eye network and click on Detect button.
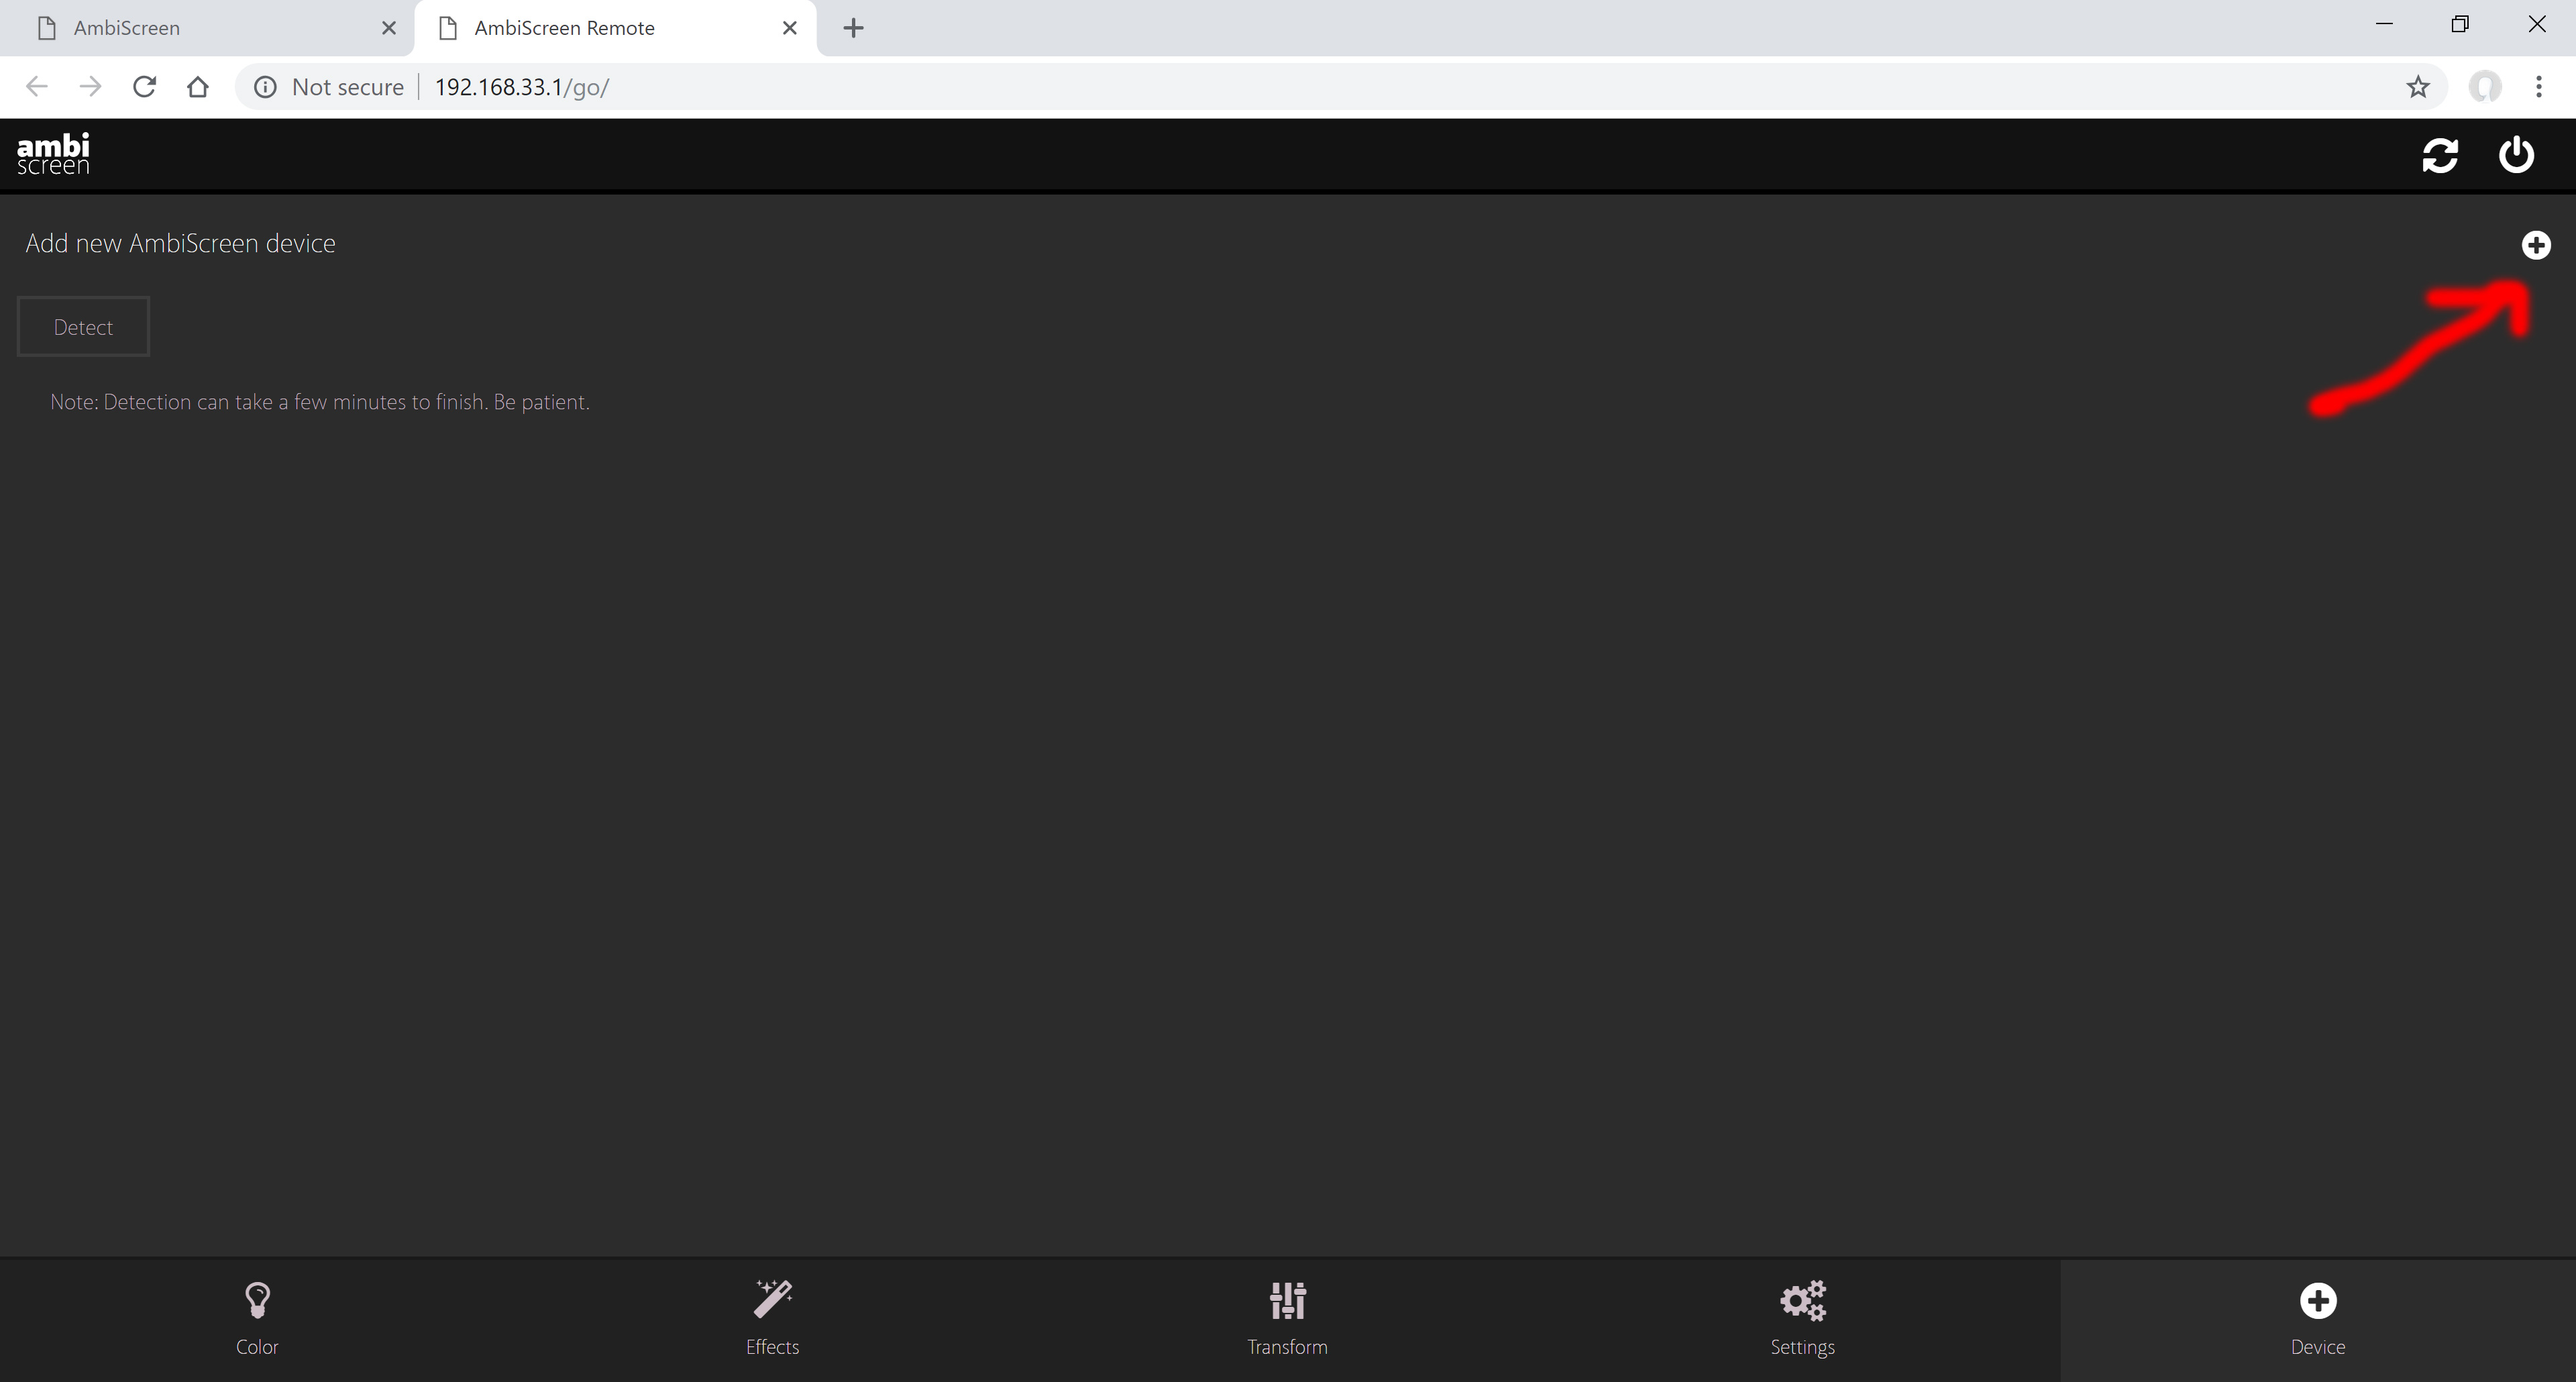
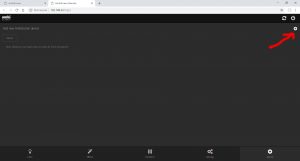
- Now you can set Eye’s webapp. When you open 192.168.33.1 click on first option “Webapp on AmbiScreen Eye”. First of all you need to go to the last tab Device
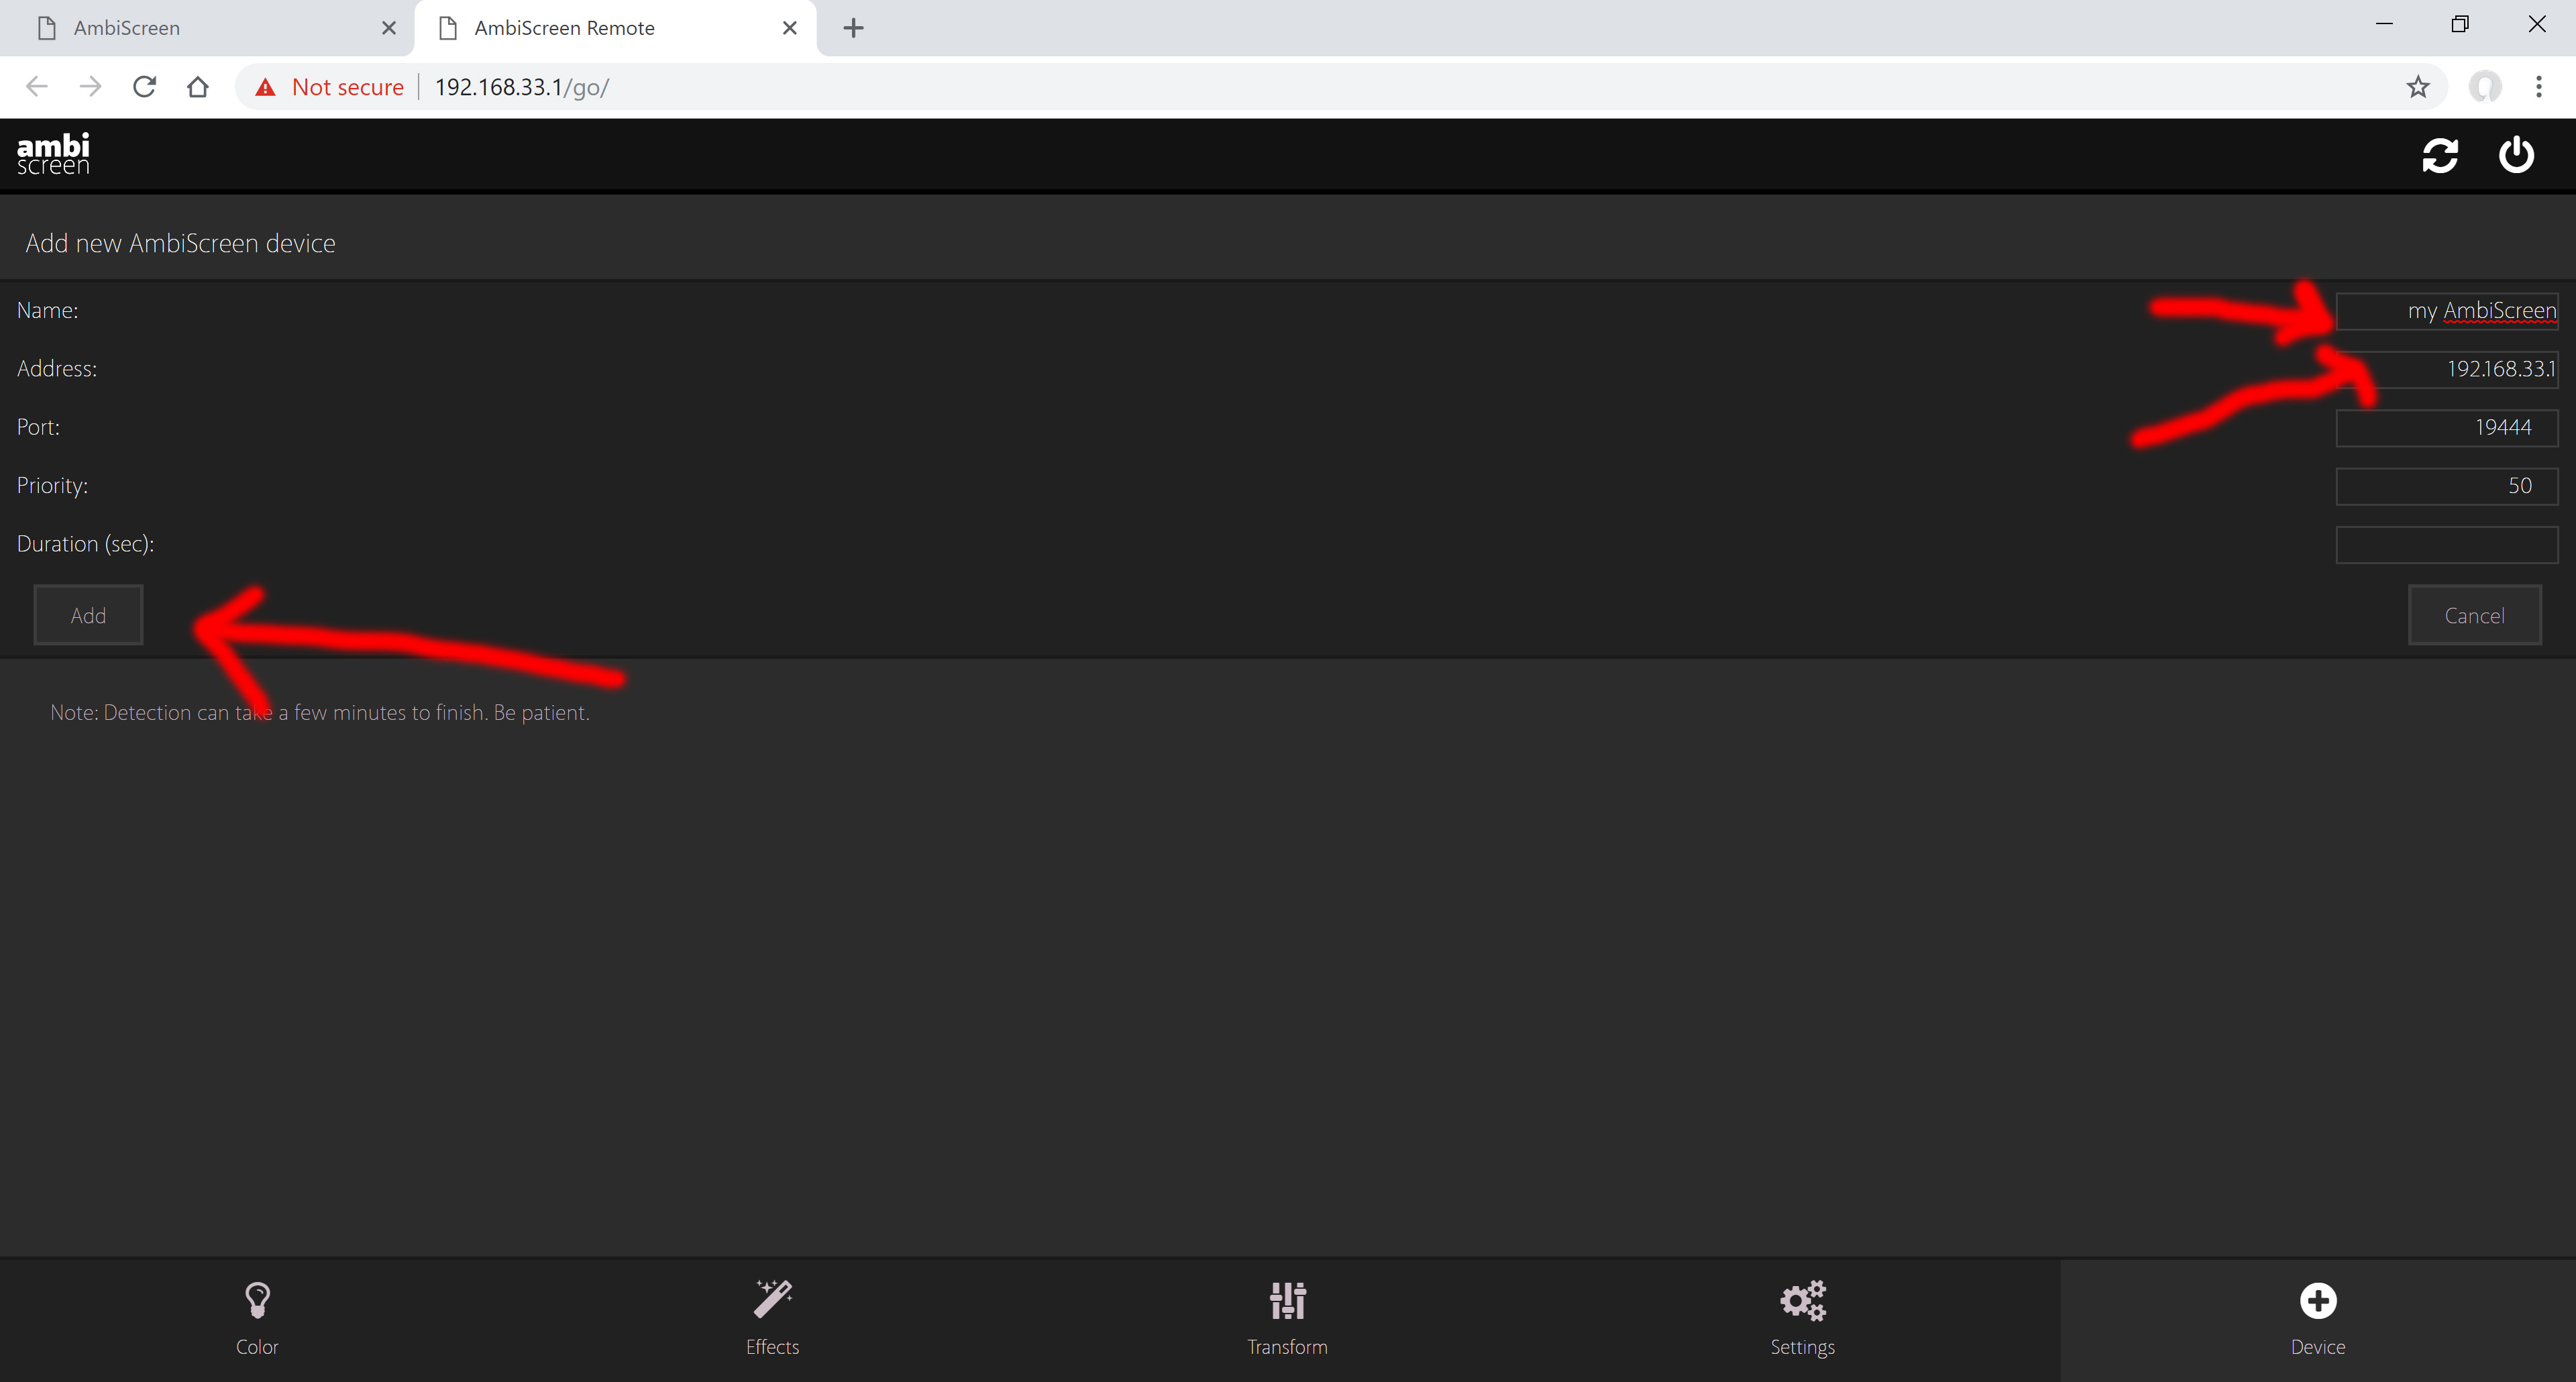
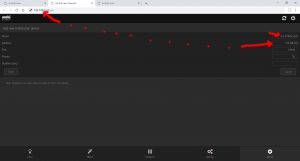
Add new device by clikcing on “+” icon
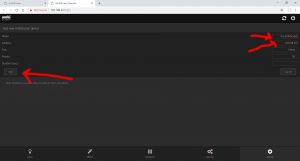
Insert name of your Eye device (can be anything). In field Address insert 192.168.33.1 and click on Add (this is useful if you have more AmbiScreen devices you can put them all together in one web app and control them without switching from one web app to another)
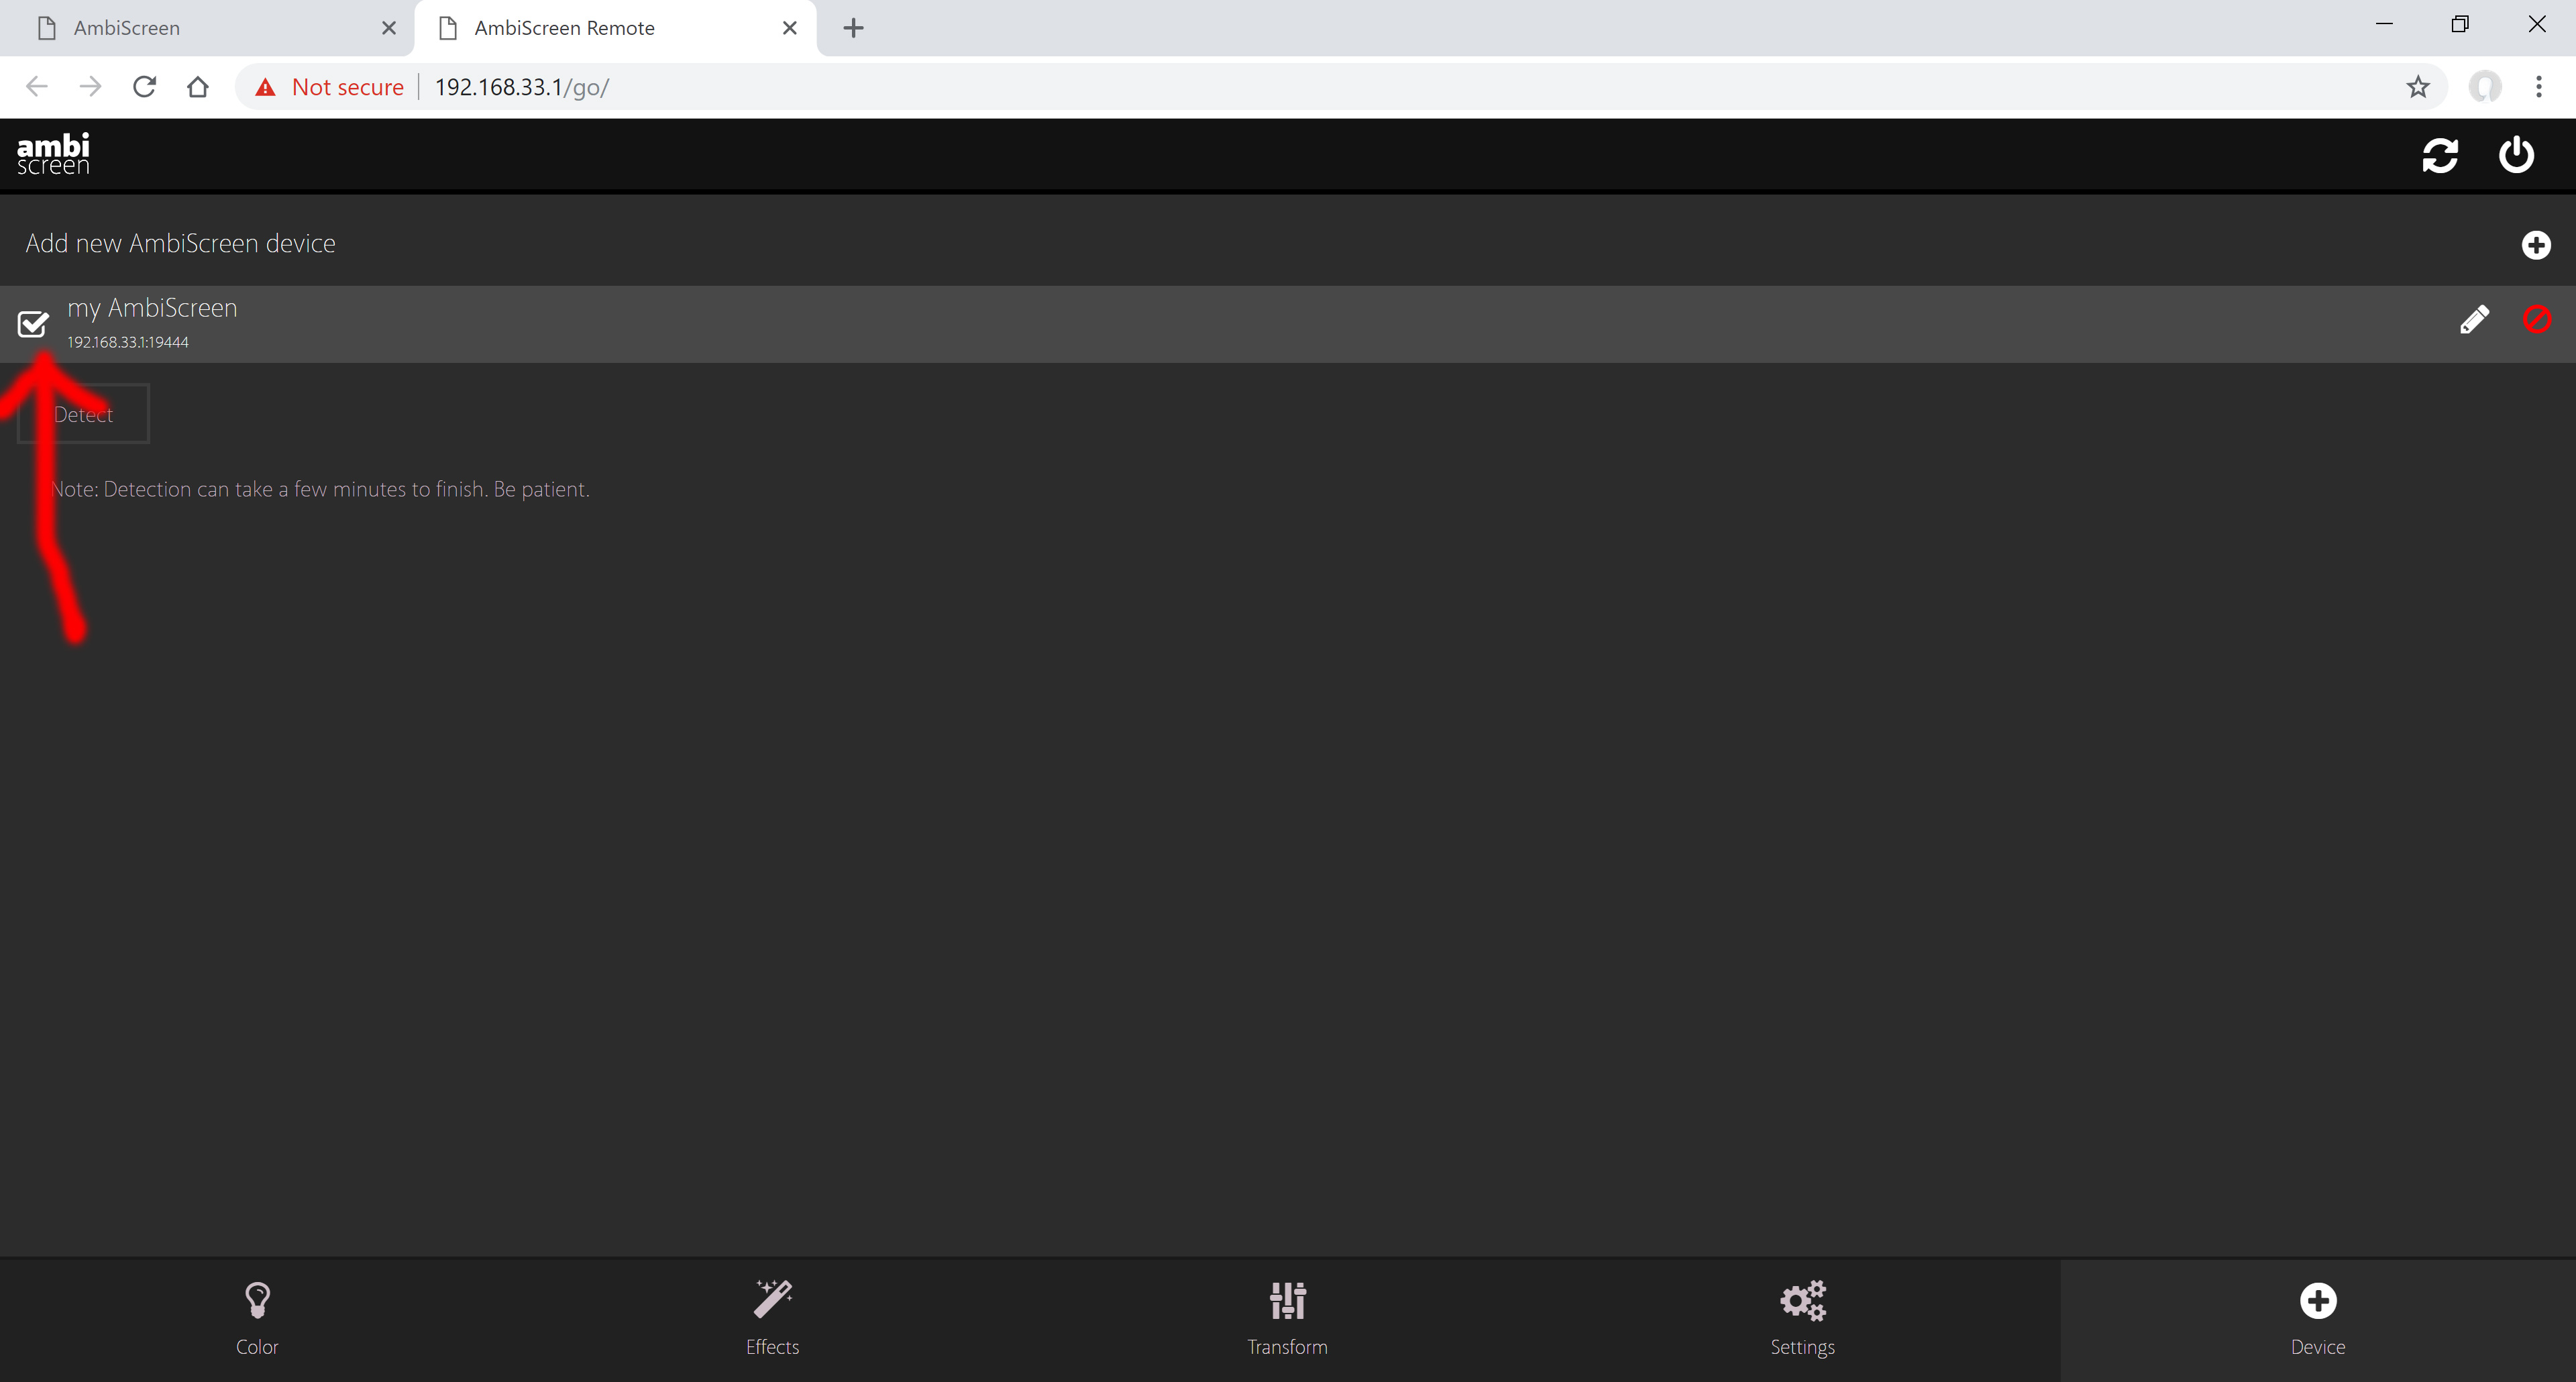
Anytime you want to connect (or reconnect) webapp to your Eye, just click on tick icon
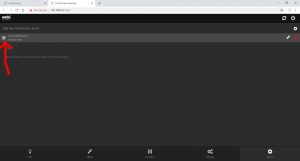
Done! Now you can use web app to control colors, effects, settings, … of your Eye.
Note: If your home wifi network is slow or you have many devices in it, you can see lag or flashing LEDs from time to time – in this case your best bet is to set “AmbiScreen as Access Point” as described above.
Note 2: For successful detection Finder needs to be opened on the device (phone, laptop, tablet,…) in the same network as Eye and WiFiLED – it means you need to open Finder on device (e.g. computer, phone, …) which is connected to internet first (in your home wifi network) and then switch to Eye’s wifi access point so now you are in the same network as Eye and WiFiLED.Setup AmbiScreen as wifi client – Advanced Setup
This setup is for advanced users as it may require additional knowledge because your home wifi network can have specific setup.
Note 1: If your home wifi network is slow or you have many devices in it, you can see lag or flashing LEDs from time to time – in this case your best bet is to set “AmbiScreen as Access Point” as described above.
Note 2: If you have wifi connection issues check that your wifi network is 2.4GHz only, it has short alphanumeric wifi network name without special characters (like e.g.apostrophes).Important: WiFiLED device boots within few seconds. But Eye boots in 1-2 minutes, so it can be visible in accessible wifi networks list in 1-2 minutes after boot.
- Turn on power on both Eye and WiFiLED.
- Connect to AmbiScreenWiFiLED network
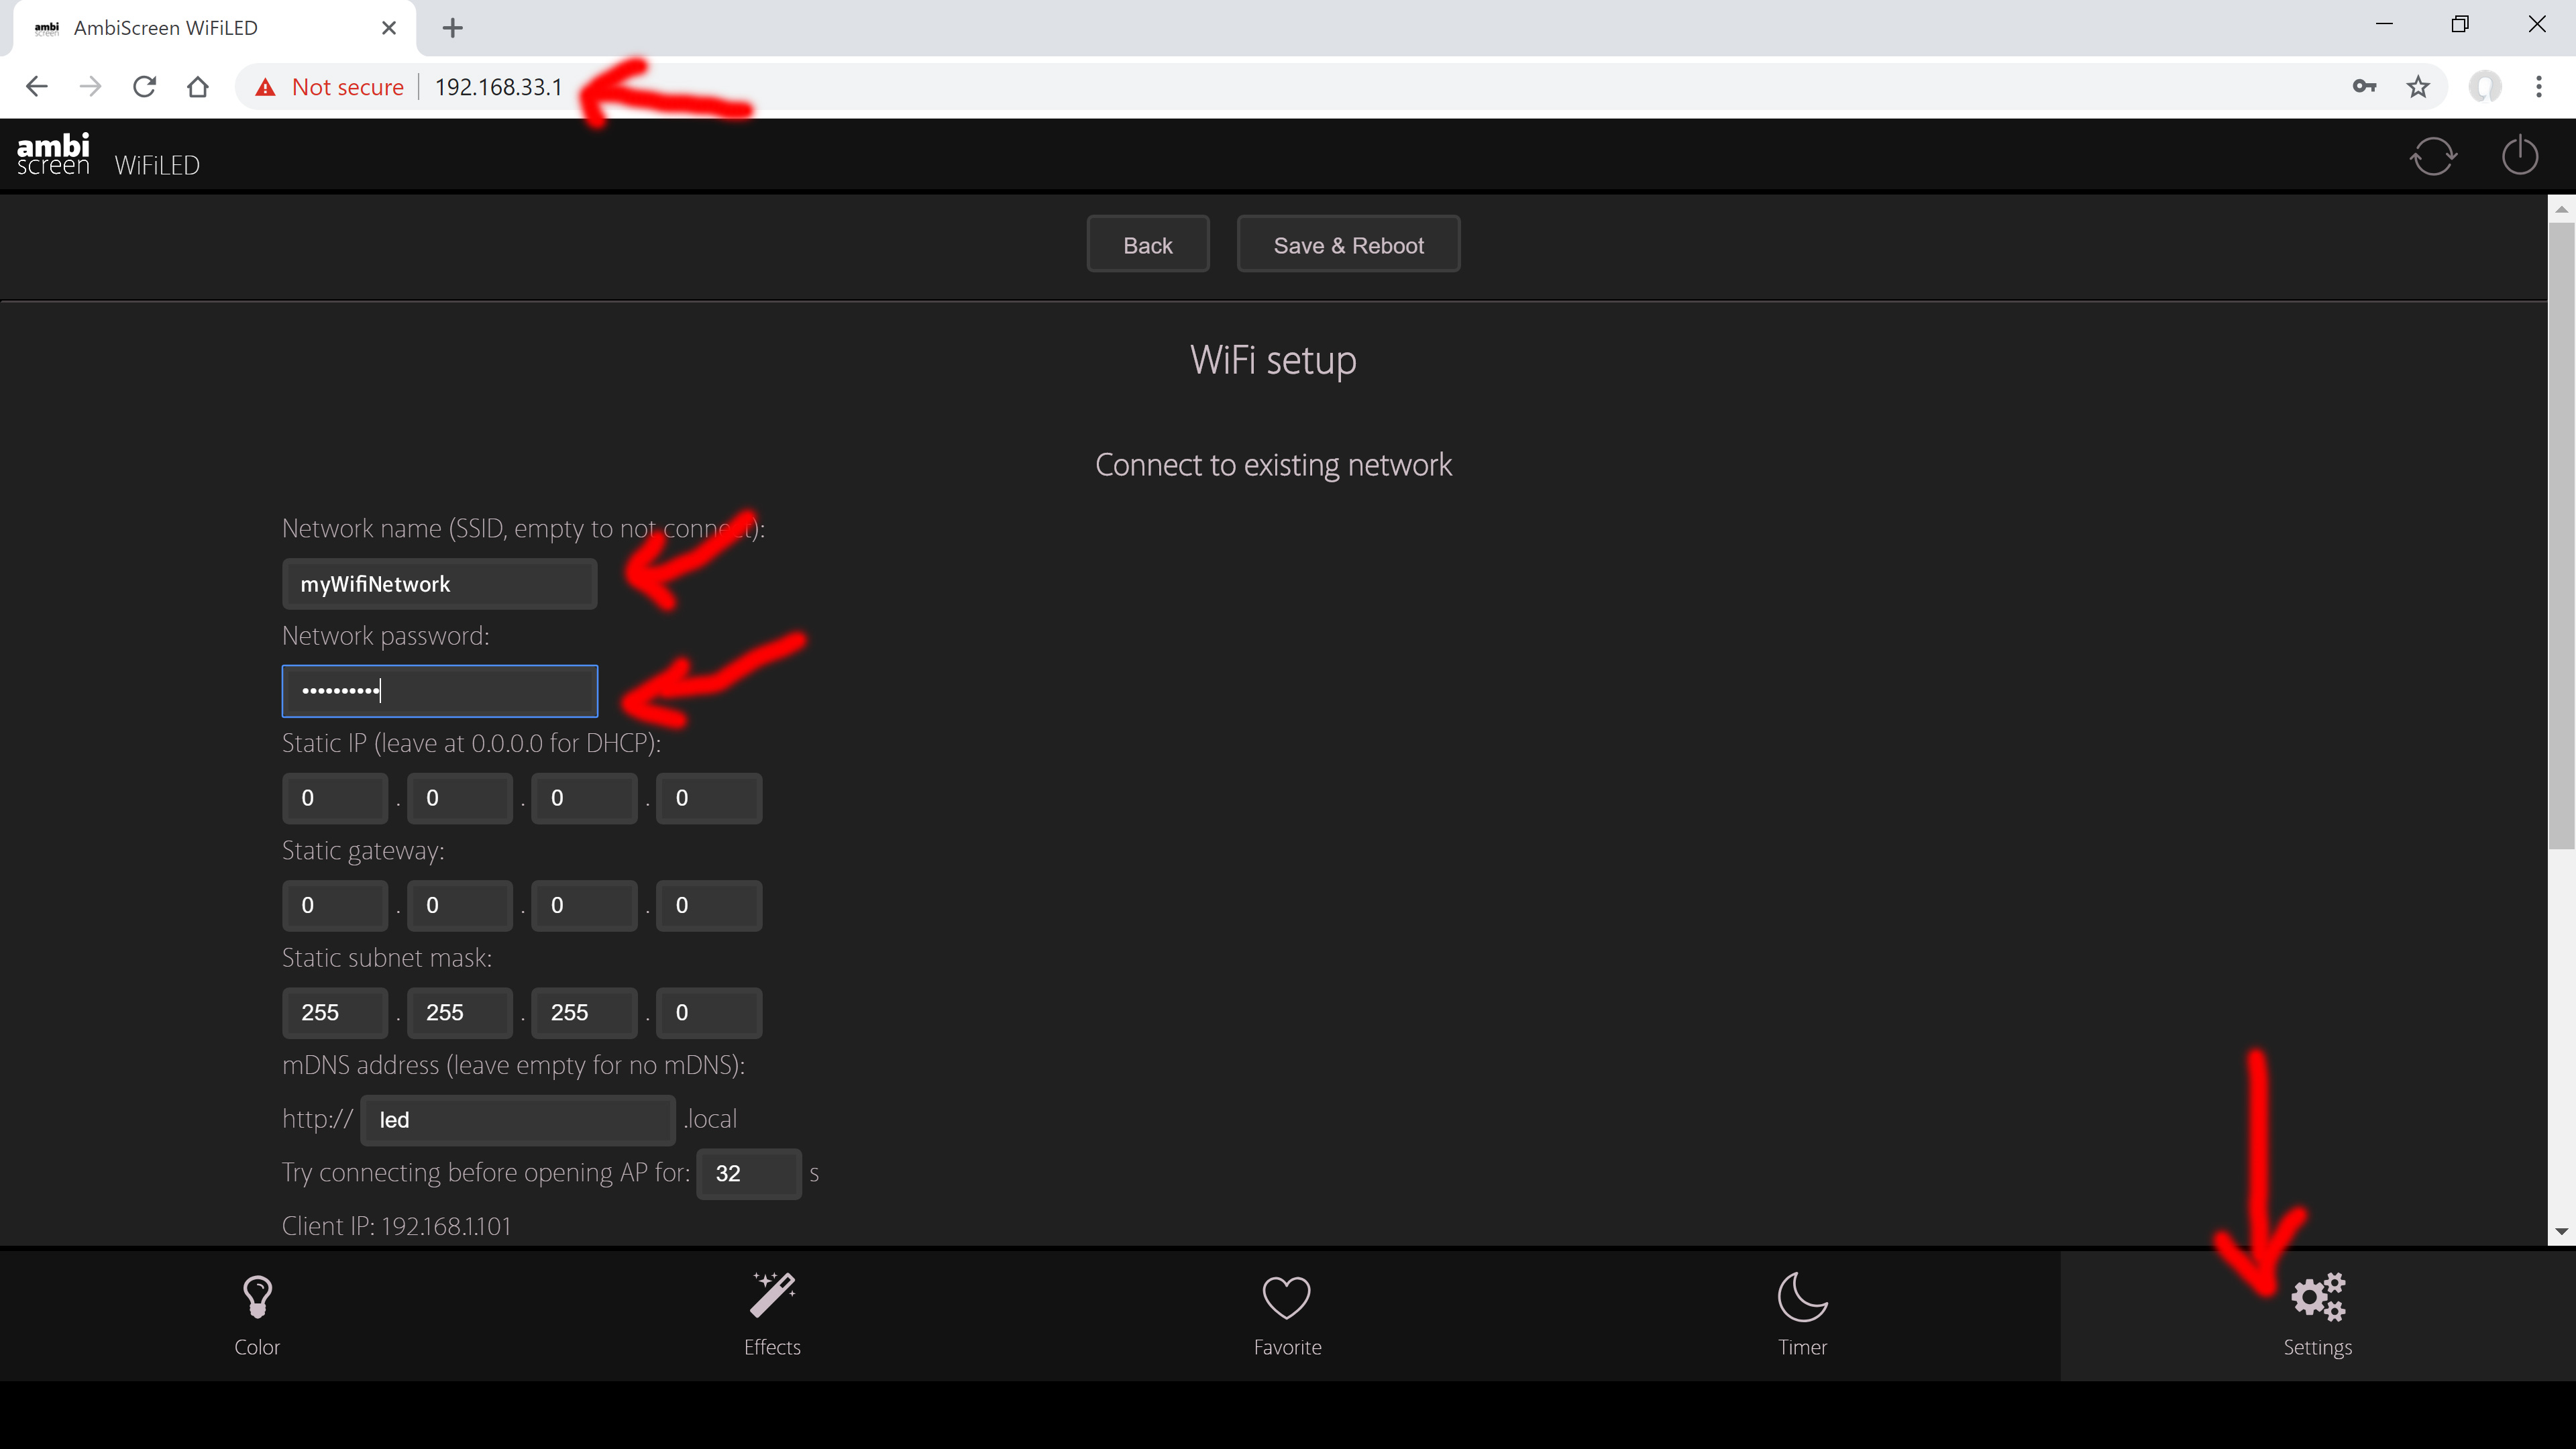
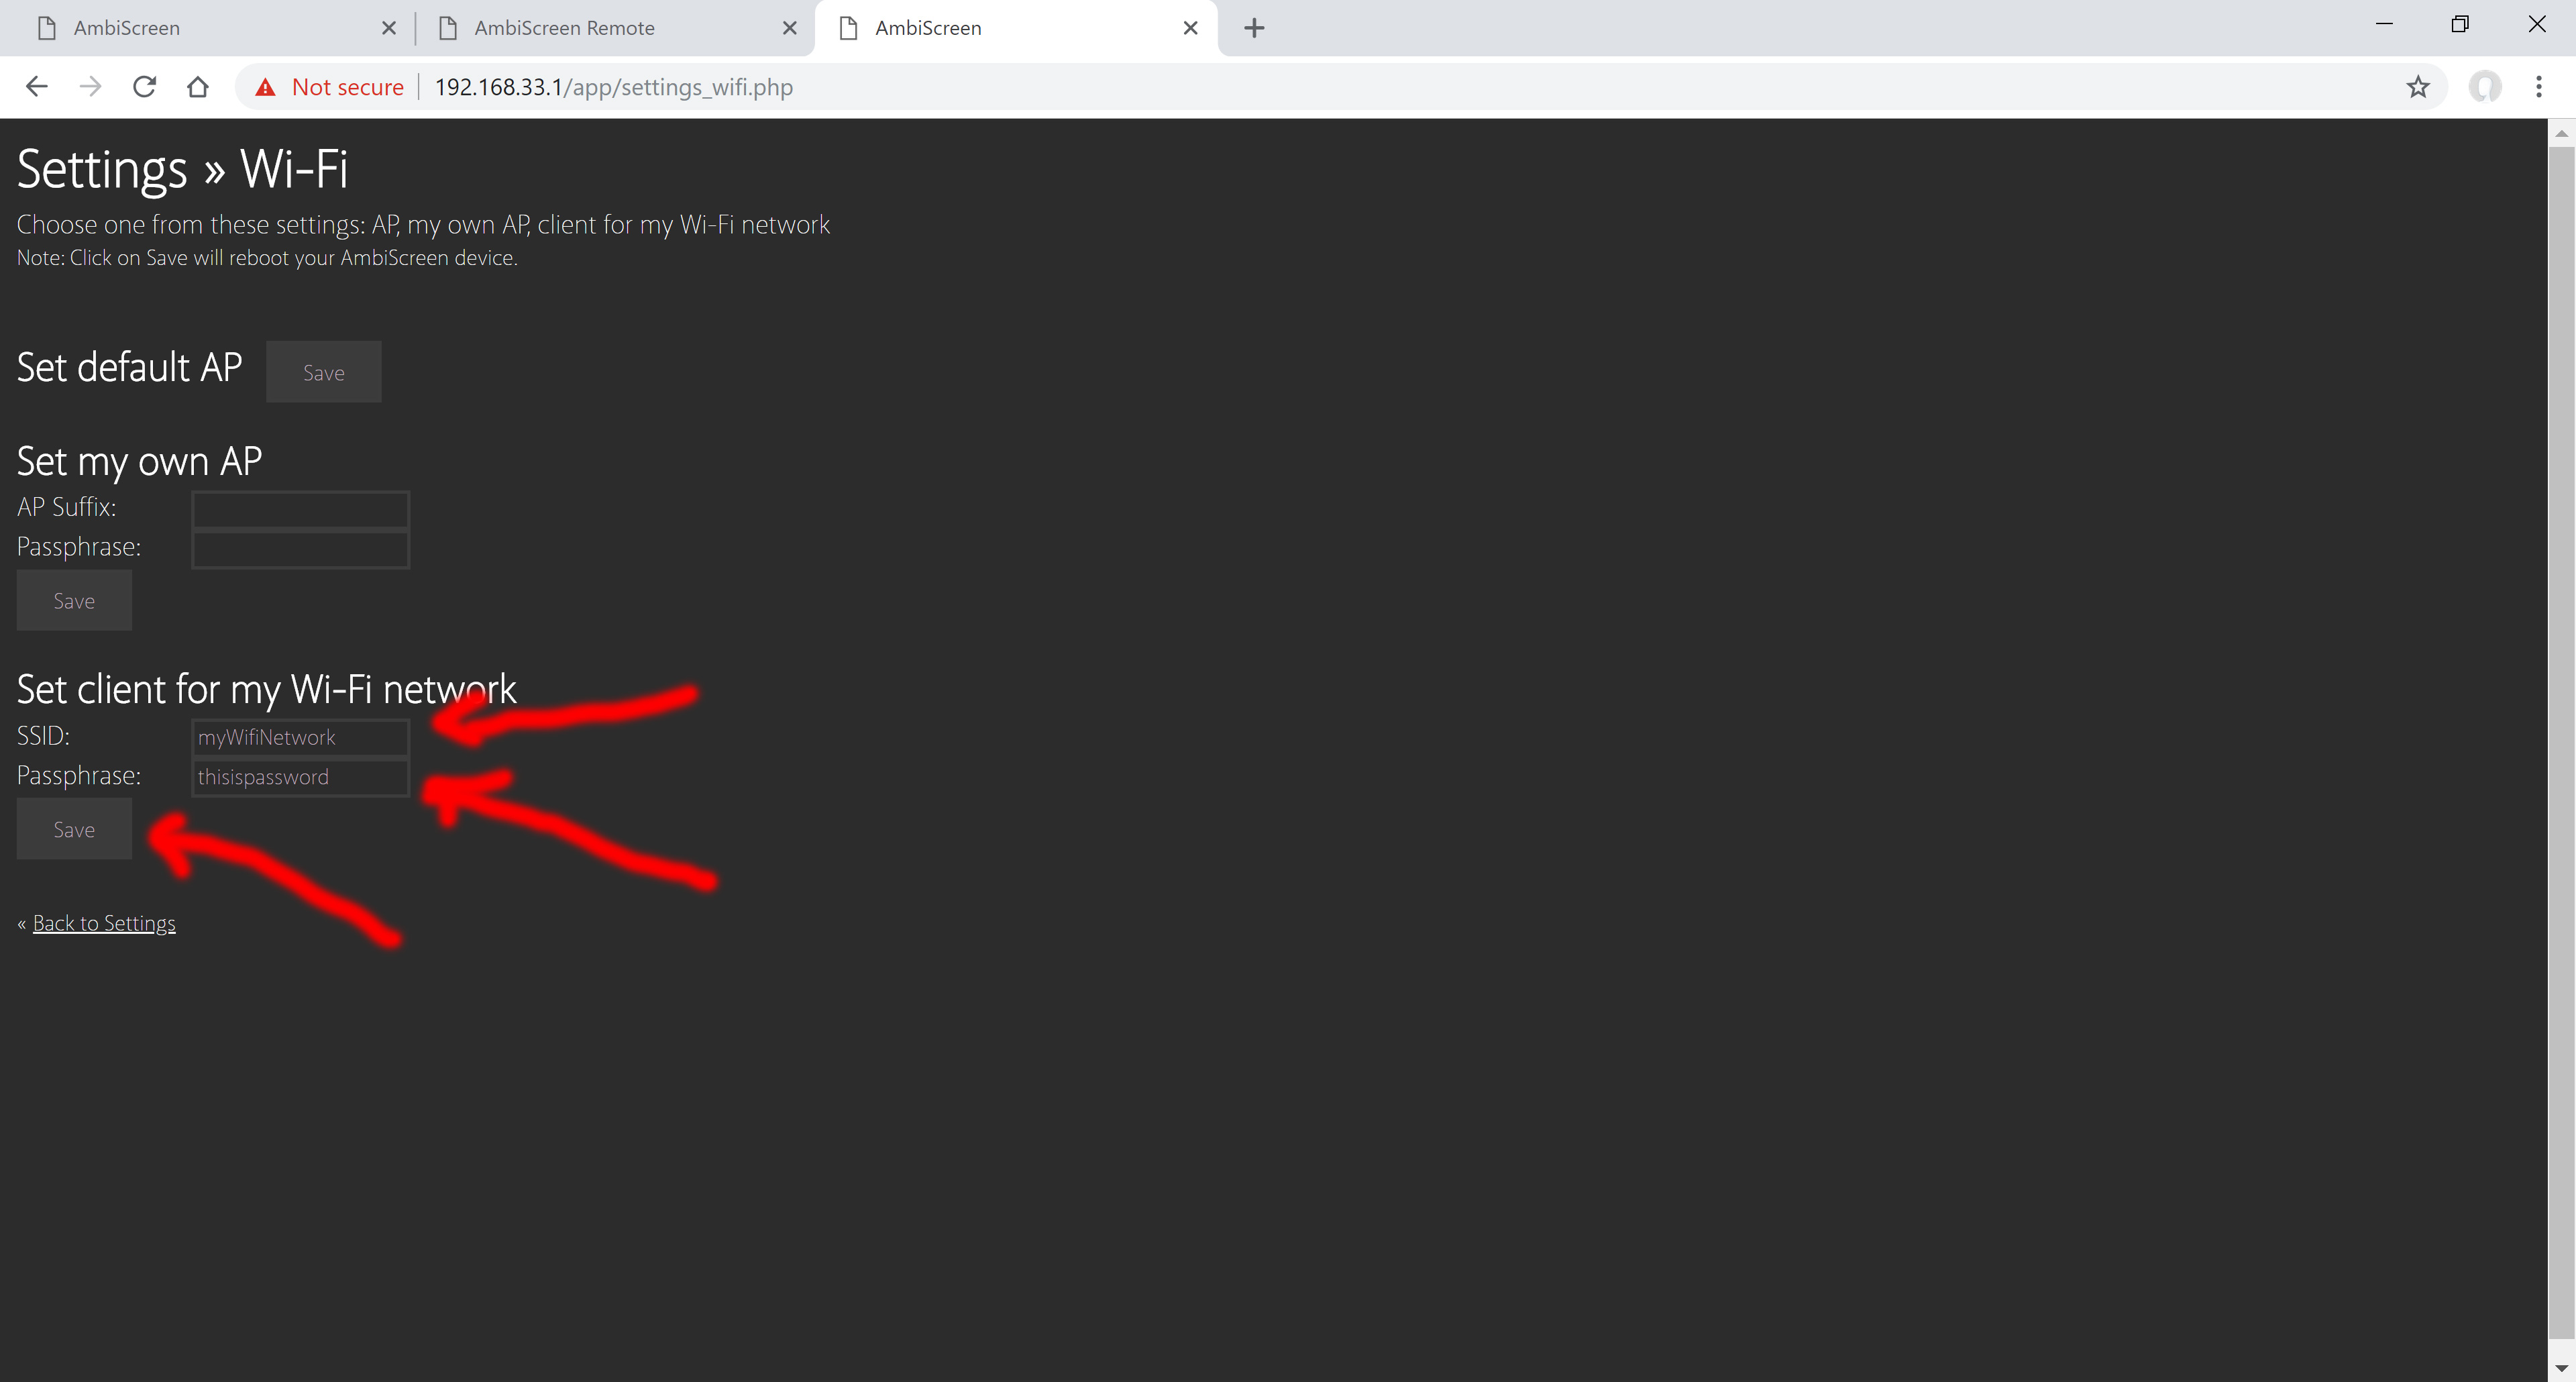
- In web browser (e.g. Google Chrome) navigate to http://192.168.33.1. Then click on last Settings Tab (down right) and insert your home network name (e.g. myWifiNetwork) and password “ambiscreen33” (without quotes). Click on Save&Reboot. Once rebooted, unplug WiFiLED from power, wait 5 seconds and plug to power again.
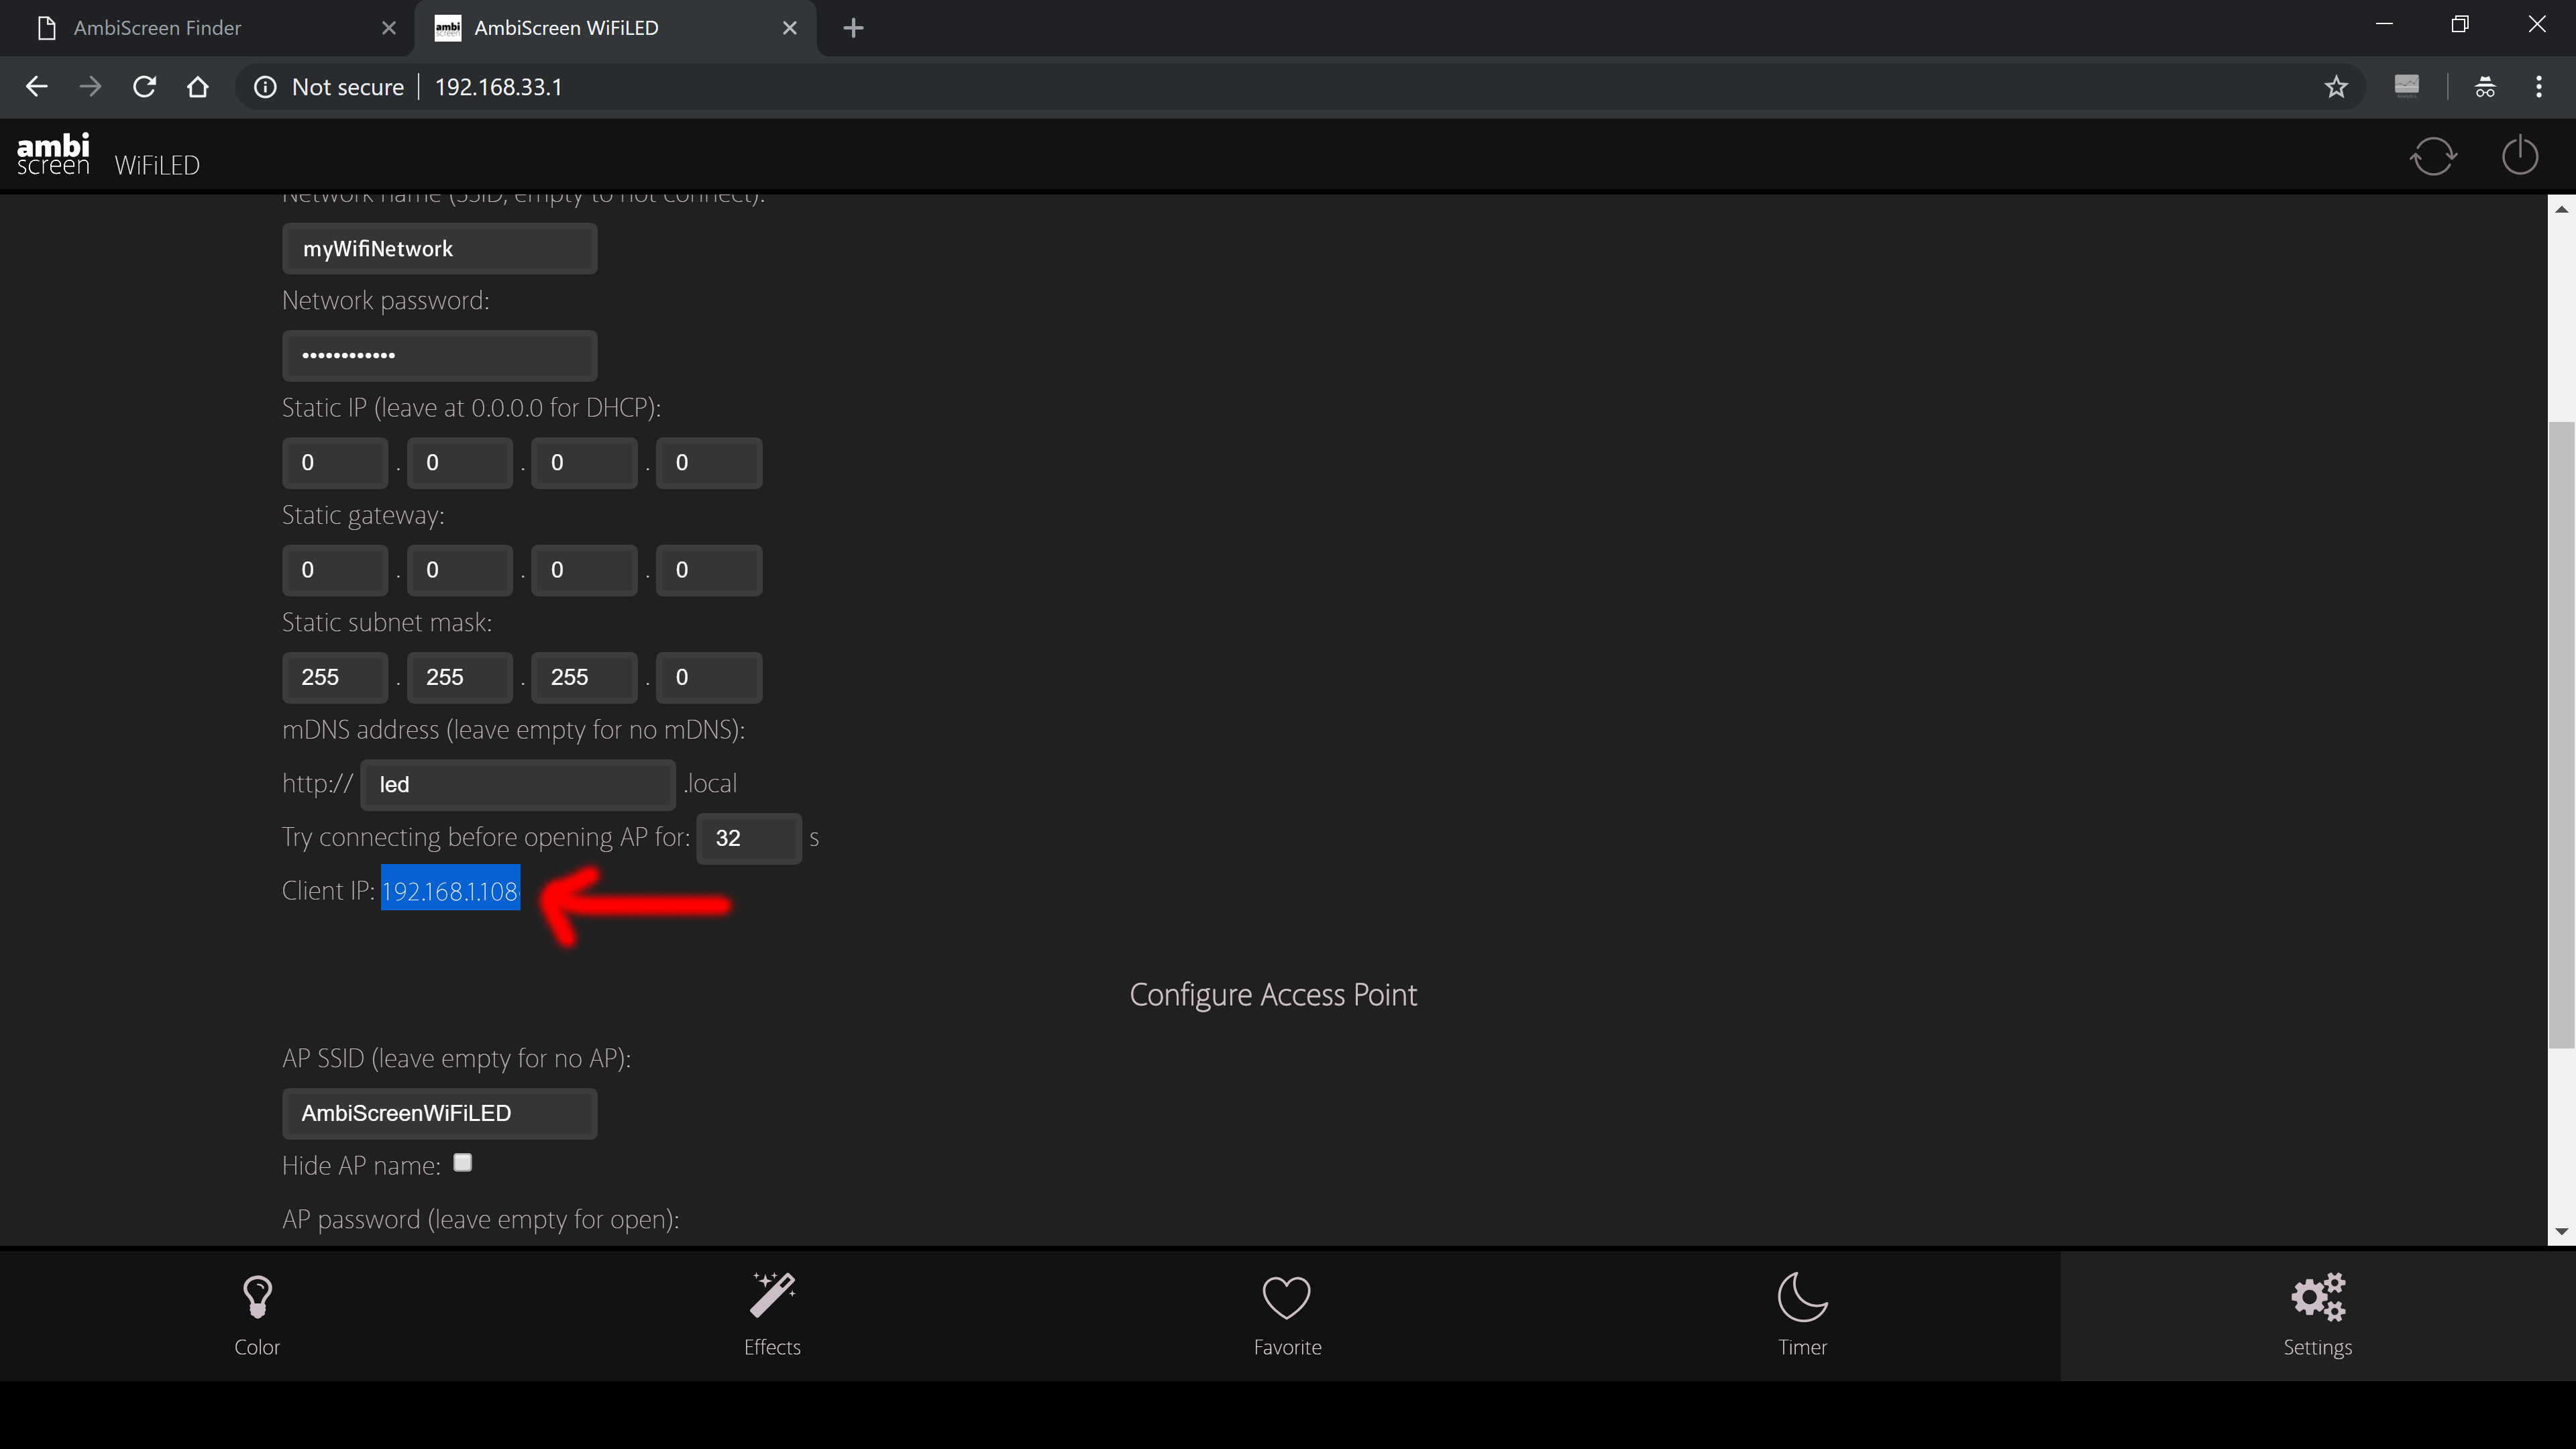
- Connect to AmbiScreenWiFiLED network again and navigate via web browser to 192.168.33.1 – Settings – and copy IP client address (in this case 192.168.1.108 but your can be different)

- Connect to AmbiScreenEye_1A1A6DF2 network (but in your case last characters will be different)
- Navigate to 192.168.33.1 and then click “Lite webapp for main Settings”
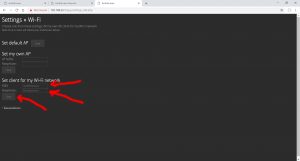
- Navigate to Settings – WiFi and insert you wifi name, password and click Save. Now Eye will reboot (on the page there will be timeout message after a while in browser window – this is correct) and after new boot Eye tries to connect to your wifi network. If your Eye does not reboot you can unplug it from power and plug it to power again.
Note: This settings will turn off internal wifi AP on Eye so you will not see it in wifi networks broadcast list anymore (as in step 5). This is difference between Eye and WiFiLED, where Eye is not visible in network list with this setup but WiFiLED is visible continuously. If you don’t see internal AP, it does not mean that Eye is connected to your home wifi for 100%. If you want to know it for 100%, you can check it in your router (DHCP table list). If there is any problem, you can revert to default settings and access point by reseting device (e.g. if your router blocks connection for Eye, you filled in bad wifi name or password). Eye boot session takes 1-2 minutes. - Now you can use Finder (http://finder.ambiscreen.tv) to locate your Eye device and WiFiLED with Detect button.
- Once Finder locates your devices, click on Eye for the next setup. Click on “Lite webapp for main Settings”.
- Then go Settings – LEDs and in field WifiLED IP insert IP from step 4 (in our case 192.168.1.108, in your case it can be different). You can customize other Led settings on this page, too. Then click on save.
- When you save LEDs settings navigate to Settings – LiveView and setup 4 edges of your TV screen on picture. Click save.
- Now you can set Eye’s webapp. When you use Finder and click on Eye (you can go to Eye directly by opening its IP in web browser). Click on first option “Webapp on AmbiScreen Eye”. First of all you need to go to the last tab Device
Add new device by clikcing on “+” icon
Insert name of your Eye device (can be anything). In field Address insert IP from URL bar 192.168.1.22 (in our case, in your case it will be different) and click on Add (this is useful if you have more AmbiScreen devices you can put them all together in one web app and control them without switching from one web app to another)
Anytime you want to connect (or reconnect) webapp to your Eye, just click on tick icon
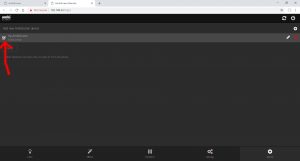
Done! At this step Eye and WiFiLED should be connected and synced together. Now you can use web app to control colors, effects, settings, … of your Eye.
Note 1: When Eye controls WiFiLED, it means that Eye is master and you will not be able to control WiFiLED directly (you must use Eye to control it).
Note 2: If your home wifi network is slow or you have many devices in it, you can see lag or flashing LEDs from time to time – in this case your best bet is to set “AmbiScreen as Access Point” as described above.
Note 3: Finder needs to be opened on the device (phone, laptop, tablet,…) in the same network as Eye and WiFiLED – it means you need to open Finder on device (e.g. phone) which is connected to the same network as Eye and WiFiLED.Troubleshooting?
Is your device loosing wifi connection? Try to place your Eye device closer to your router.
Colors are different? Eye contains LiveView page (accessible via web app on Eye). If color of your liveview leds is not correct, try to check what Eye sees. Everytime you navigate or refresh LiveView page, new image is grabbed. You can access this image at liveview page or directly via http://IP_of_eye/app/diagnose/liveview.jpg (replace IP_of_eye with current IP address of Eye device).
You can also go to Settings-LEDs of Eye and turn off color boosting with placing value 1.0. Or you can use other settings such as R,G,B values to adjust colors directly. Via webapp at Transform tab you can see these changes live (and later you can put these values in Settings-LEDs and save them to store it as default values).